Image

Sip by Swell Insulated Bottle

14 Aug

Baby outfit and hat

Us breastfeeding moms drink a. ton. of. water! Amirite!? I feel like I’m dying of thirst randomly throughout the day these days and I neverrrrr have been one to do a good job about drinking my recommended 8 glasses of water a day. When I partnered with Sip by Swell for one of their water bottles that definitely changed. Their bottles keep the water soooo cold for sooo long. When I got back into my car after it sat in the hot sun for a couple hours I thought I’d check my water and see just how cold my Sip bottle really could keep it. Lo and behold there was still all the ice, not melted at all. I like my water icy ice cold. And since my bottle is really cute looking too I take it with me everywhere! Annnnd drumroll – suddenly I’m a drinking fiend…of water…just water. Still avoiding my adult beverages for the most part. Look how cute my little white Sip water bottle is in these pics below. And that baby doesn’t hurt either.

Water Bottle – Sip by Swell

Baby zip up – Babybreez (soooo soooo soft I will continue to buy these each time she grows out)

Baby Turban hat – Big Noggin Baby

My Jeans – Warp & Weft

Traveling with a baby made easy with Dock-a-tot

30 Nov

00100dPORTRAIT_00100_BURST20181129170102078_COVER.jpg

I recently traveled across the country from Washington State to Florida, twice.  Once when my baby girl was 6mo old and again when she was 7mo old.  Lots of traveling with a baby means lots up upheaval with naps, overnight sleeping, and just all around routine and scheduling that I worked hard to achieve before we left.  The time change and new locations honestly threw me, and her, for a major loop and it would not have been survivable without our Dock-a-tot.  I say this because it was something familiar to her… and that brought some stability to our routine.  So yep, I brought it with me across the country.  From the airport to the beach, it saved me.  First of all, it’s REALLY easy to travel with.  There’s a built in handle so carrying it around like a big bag is easy-peasy.  Second, it fits into the top compartment of a large suitcase – for my flight home I decided to pack it – and *BONUS!* I was able to stuff all my more fragile things into the insert in there.  You bet I took our Dock-a-tot with us on the airplane, to the beach, to the pool, and really everywhere I could bahaha 🙂 I knew she would sleep in it on-the-go because it’s a familiar little bed no matter where we went.

Here are a few pictures of her lounging poolside in it.  Because the bottom is so thick and padded it was SOFT and COMFY for her to lay in even on the hard pool deck.

00100dPORTRAIT_00100_BURST20181129170201057_COVER.jpg

Annnnd, she finally fell asleep in it for a nice poolside nap.  Yay!!

00100dPORTRAIT_00100_BURST20181129170155286_COVER.jpg

Thank goodness for the Dock-a-tot because during her naps and even just her play time she preferred to sleep and lounge in it everywhere- clearly it made her feel safe and comfortable and familiar.

LRM_EXPORT_6938017759326_20190715_210638512.jpeg

Below: Here we are in our sun tent on the beach.  It was soooo hot so we stripped her down to a diaper and she was happily chewing away on everything while she stayed put in her Dock-a-tot.  Just let it alllll hang out baby girl!

LRM_EXPORT_7048351911984_20190715_210828846.jpeg

Annnnd, you might recall this picture below from a previous post when she was just a few months old napping in her Dock in a poolside cabana back home in Washington.

0208-2018-093955387731549997.jpeg

See, I literally travel everywhere with it!

Unfortunately I forgot to snap pics of this but on the airplane my husband and I laid the Dock-a-tot across our laps and she slept in that just as if she was napping at home.  Ahhhh!  Peace!

So, if you catch my drift, traveling with the Dock-a-tot is SO easy, and SO worth it.  It’s a lifesaver, really.  Did I mention they have super cool travel bags/covers?  Yep linked it right there for ya!

Dockatot VS Snuggle Me Organic

22 Aug

Which one is best??

play mat: Yay Mats

baby bed: Dockatot

baby turban hat: Little Scouts Co

high waist bummies: Big Noggin Baby

When my son was a baby there were very limited options for baby beds…and since then two have sprung onto the top of every mom-to-be’s baby registry. The Snuggle Me Organic and the Dock-a-tot. Both are trending right now (but mostly the Dock-a-tot as you’ll see it EVERYWHERE from celebrity endorsements to literally every Mama’s feed on Instagram 🤷). Is Dock-a-tot all it’s chalked up to be or do they just have way better marketing? What’s the deal with these baby beds, which is best, and what one should you buy? I was fortunate enough to try both of them to give you a good side by side comparison. There are pros and cons to both. Read on to hear more!

Here’s a picture of the two side-by-side.

The Snuggle Me Organic

baby romper: Rags To Raches

Headband: Aubrey Gianna

The Snuggle Me Organic is much much smaller than the small size Dock-a-tot (the deluxe). When my 3 month old baby girl is in her Snuggle Me her head and tush are right up against the outer pillow. She fills the entire inside “sling” part. But…she’s long, so I can’t speak for everyone’s babes at this age.

It is tight, it is small, but it does hug her close and cradle her. I assume she feels more secure in this because it’s as if she’s being held. The fabric definitely does pull in from the sides when you lay your baby in and the snug fit really does seem to hug her as the Snuggle Me marketing suggests. She. Loves. It! She sleeps for hours in hers for her naps etc and no I haven’t done any type of sleep training or even teaching her to self soothe yet. She falls asleep on the boob half the time before I lay her down in it. 🤣🤣🤣

The downsides to the Snuggle Me are

1) It IS really small. By the time she’s 4 months old she will not be able to fit safely in it anymore. For awhile now she’s been sleeping with her legs extended over the bottom and sides and that works okay still, but soon she will either be propped up on head end or tush end onto the big side buffer pillows. Newp. Not going to fly. The whole purpose is for them to be nestled within so they can’t roll. So size-wise… It’s a very small window of time to use it and that’s kind of a big chunk of change for 3 months of use. 😭

Information about the picture below:

She’s 3 months old here.  Her head and tush are right up to the outside buffers with her legs hanging over the bottom when they’re stretched out.  She does seem super comfortable still…but I don’t think she’ll fit in it much longer.

2) The bottom is not padded. The part where you place your baby is just a few layers of fabric thick. The sides pull in when you lay baby inside but your baby will not be suspended in a little hammock environment as I pictured. Instead your baby will go all the way down onto whatever surface you have the Snuggle Me on. So hard floors, even the carpeted floors, were out for us. This means I always had to find padding, or create it, to lay the Snuggle Me on. I couldn’t just take this and use it outside on my mom’s porch when we visited or in the grass at the park or sand at the beach. Kinda a big drawback.

The Dock-a-tot

I love the Dock-a-tot!! It’s gorgeous, functional, and easy to carry around and use anywhere. The idea that my baby is used to this bed makes it so she can literally sleep ANYWHERE cuz she’s in her same little environment and it’s one we can take and use on any surface, even the wood floors! We took it to the park the other day and it was a lifesaver! Here she is hanging in her Dock at the park.

And here she is taking a nap in a poolside cabana in her Dock-a-tot amidst loudness and chaos!  She was soooo comfortable sleeping in it even though we were in a new environment!  Also, I sat right next to her to ensure nothing could happen like her falling off the bench.  Please always remain close to your baby when they are in their Dock-a-tot.

My babe feels secure in it and sleeps great in it and she has room to grow in it too. The Dock-a-tot is literally the perfect lounger/co sleeper and you can’t go wrong with it. My girl feels super secure in hers and the best part is it lasts longer since it is bigger than the Snuggle Me.

The downside to the Dock-a-tot is

1) it’s not as small/tight fitting as the Snuggle Me so in the early days and weeks of newbornhood it might be little more spacious and not as comforting.  The tightness of the Snuggle Me seems to be a big plus for those early days.

So…which to buy:

Unicorn Blanket: Clementine Kids

So what does this all add up to!? 🤷

Well, I feel The Snuggle Me is the ultimate sleeper for newborns and tiny ones (like for the first month) but you’ll need to upgrade to the Dock-a-tot fairly fast once your babe has grown too big. So, if you can only buy ONE then I would say buy the Dock-a-tot. A newborn is so happy in the Dock-a-tot as well (sure beats a crib or any other sleeping experience!) and you’ll be able to use it much much longer! After that newborn stage the Dock-a-tot is perfect size-wise anyway. Plus, it’s more versatile in terms of travel and that’s important!!! Your sanity will be saved in those early months when you’re visiting family or going out and you can put your baby down for a nap wherever! And trust me, that’s necessary since they need a nap like every hour! 🤦

.

.

.

I received product compliments of Dockatot

We were featured on Style Me Pretty blog

9 Jan

Okay, I know you’ve seen this shoot a bunch now, but this time it was featured on one of the greatest wedding blogs everrr, Style Me Pretty– check that link out to see the full feature and the fabulous paper goods by meeee and the florals by Daniela Faget.  We were so excited to see so many great shots of our paper goodies and our name listed in the vendors list at the end.

Thank you, Style Me Pretty, for the feature!! …and Justin & Mary Marantz for including us in your shoot!

xoxo,

Marissa

Photo Shoot with Justin & Mary Marantz

25 Oct

Earlier this year I had the privilege of participating in Justin & Mary’s “Spread The Love” tour by creating all of the paper goodies for their “Water For Elephants”, Seattle stop.  If you don’t know them…Justin & Mary are two of the top wedding photographers in the country right now!  Here’s a little article about them on Style Me Pretty.

I posted a few times about the shoot awhile back, so check those out for some photos.  The paper goods, signs, bunting, etc were all designed & made by us!  Also, Justin & Mary posted about it too; so I was super excited to see me (Lifework Media) in their list of participating vendors!  w00hoo!

Just received a CD in the mail not too long ago with all of the pictures this amazing photography duo took from the shoot.  Here are a few pictures from the set:

Also, I found my goodies displayed in a few other places on the internet.  They are all over one of my favorite sites online (awesome!!), and then on a few photography blogs like this one.

I had a wonderful time participating in this shoot…and since then I’ve made gorgeous paper goodies for a few other photo shoots.  One was for a WPPI training shoot & another was for a magazine (can’t say which!) that will be hitting newsstands in January.  Excitement!

It’s here! For The Love of Press- now open for business!

7 Oct

Well…finally…the big secret can officially be unveiled!

Our yummy letterpress stationery shop is now open online!  Go check it out!

I’m so excited to introduce this line to you and so excited about the fact that we are able to provide “customizable” details.  Basically every card you see is able to be changed and printed in any colors you want.  Not to mention, we have delicious envelope liner patterns for you to pick and choose from to match (or contrast!) with your cards.  Drool!

Just for the record, we are currently working on a ton of new cards & other goodies (think calendars, note pads, coasters, and more) to add to our line.

Hope you enjoy our goods!

-Marissa

home grown goodies

4 Oct

I’ve been taking pictures of the progress of our garden as it has grown…and then as it has taken over the world.  This garden was such a huge success the hubs and I have been kicking ourselves that we started with too many of each plant.  Yes, we were afraid most wouldn’t make it, as usual, so to be sure we would get some of everything, we planted extras.  Oops.

Not only is everything doing well, but everything is either bigger, stronger, or taller than any we’ve seen.  If I didn’t mention this earlier, we rototilled a TON of really old chicken poop into the soil before we planted everything.  We found the chicken poop in our chicken coop on our property (which has yet to be used by us- though the plan is to get some chickens this spring.  Think, farm fresh eggs!  Yes please!).  I credit the entire success of the garden to the chicken poop we used.  It’s like Kryptonite to Super Man.  No…it’s like girls to Charlie Sheen.  Case in point…our tomato plants are not little bushes…they’re trees!  No joke.

Sadly though, now it’s getting colder outside and our precious food source is starting to die off.  I’m bummed!

Here are some pictures to show you the progress of the garden and the tasty treats we were able to harvest!


This was taken right after we planted everything.  You can just barely see the plants, but they’re there.  Also, note the grapes (growing up the posts) and how small they are.

BEFORE of side garden

AFTER- the grapes are growing up the arbor!  Eventually, cute little gate under there and into the garden.

Yay!  Veggies are planted!  BEFORE picture

AFTER six weeks picture

BEFORE of peas on the teepees, and corn starts to the left

AFTER 8 weeks (peas!!) & corn!

It’s growing!

Corn is gettin tall..

The pumpkin patch is taking over.  Next year, definitely not planting pumpkins in the garden…they will get their own pasture!

A nice row of cabbage

Those tomato plants are SO small here!

Pumpkins looking into the tomato plants (yes, those are basically tomato trees in the background!!!)

A green pumpkin

the most delicious squash!

Broccoli…by far the best I’ve ever had

we couldn’t keep up w/the zucchini…so sometimes it got a wee bit big.  See hand vs zucchini?  Zucchini wins.

Three diff. types of corn & two diff. varieties of cucumber.  Yum!

Artichoke!  But didn’t harvest it this year, because you’re supposed to wait til year 2.

A cucumber on the vine.

Yes, that’s right…that’d be eggplant!  TONS of them!

Bell peppers.  mmm!

Pumpkins are turning orange!  This one is huuuuge, but hard to tell, I know.

Apples from two of our trees.

Couple varieties of pears from our trees!


That’s all folks!


I can’t keep my own secrets so I’m giving a sneak peek

1 Sep

I can’t stand it.  I’m so excited but it isn’t the right time to make the big announcement.  No…it’s not a puppy.  And no…we’re not pregnant.  This is even better (I think)…but, alas, I can’t divulge because it’s not ready yet!

So, in the meantime, I’m providing you with a few pictures of some stationery I designed and letterpress printed.  At least it gets a little bit off my chest, gives you a little taste of the goodness that is letterpress, and holds me over for another week or so.  Ughhh..why do I do this to myself?

That is all.  Check back in…say….oh a week or so when I can finally explode with giddy happiness over my newest and latest venture.

Enjoy.

sneak peek: art deco inspired invitations

25 Jul

So my hubs today asked me how long it has been since I wrote on the bloggity after suggesting it has been awhile….and I was all “phft…not that long.”

But inside I knew.

I knew the truth was something I’d buried deep (ok, maybe not really)…as I promised myself I would never go this long without writing and I’ve been continually putting people off who have been asking to see my recent work.  Eek!

The good news is I’ve been SO busy (yay!)  but the blog has fallen off the edge of the earth.  The bad news is I have SO many wonderful designs & goodies I’ve completed in the last few months, but literally no time to take pictures and post.

Anyway, in keeping with that…I’ve already taken up too much valuable time as I am desperately trying to assemble 100 invitations for a last-minute client who had 4 weeks for design.  Not to mention, my puppies are scared of the thunder that is booming outside and jumping into my lap for comfort.  It’s a beautiful thing, trying to glue & tape with a pup in my lap.

To satisfy your fancy, just wanted to post a little sneak peek of the gorgeous teal envelopes & custom patterned liners I’m assembling for this current invitation suite.  My client, Joy, wanted an art deco/art nouveau inspired invitation set with all the bells and whistles- custom envelope liners, 3 color letterpress printing, various patterned backings on each of the pieces, custom postage stamps, rounded corners…the list goes on…and the invites are fabulous!

Here is a picture of the envelope & the custom liner I created that we’ll be using for Joy’s invitations.  The colors: teal & chartreuse

More pictures to follow of the full set.  Maybe in a year or so.  🙂

For the love of antlers

28 Jun

When we moved into our 1904 farm house almost a year ago, it was less “farm” and more “ranch”.  The previous owners had set the house up Montana ranch style- cowboys, antlers, bull horns, animal hides and all.

We really had to see past a lot, which we did of course…because we ended up buying the place.  Nonetheless…it has been quite the process of remodeling and redoing.

Our purchase came with a wonderful “perk” though!  Horrible, ugly, yucky antler chandeliers in the family room.

Hate!

On the other hand…antlers have definitely made a comeback and I’ve been obsessed with all of the ones I’ve seen in the magazines, so what the heck!?

After much persuasion from the hubs to “make them work” Tim Gunn style…I created an antler inspiration board to help us.  While I don’t like the antler chandeliers we’ve got…I do LOVE white antlers, faux antlers (wood & ceramic?), & patterned antlers.  Love them!

What do you guys think?  I think it’s time we painted ours white…

and go….

We made a table. A reclaimed wood table. I die!

27 Jun

The title gives it all away.  This weekend my hubs and I took on the do-it-yourself task of building a coffee table.

But not just any coffee table.

I wanted a very large table.  I wanted a rustic table.  And I wanted a wood table made from old wood.

As I will with all of my future projects (whether it be work assignments or home projects), I began by collecting coffee table inspiration to one of  my boards on…where else….Pinterest.  My current true love.  Yes, Pinterest completes me!

Both the hubs and I wanted something different, but simple…and rustic, but not TOO rustic.  But most importantly, we wanted something really big.

First, we gathered some old wood planks on our property from the original barn.  We had collected this wood and brought it indoors as soon as we moved in, knowing we were going to use it for some projects someday.  The wood planks are gorgeous, with a sun-bleached gray color & rusted nails that have run & dyed the wood surrounding them.  Effects you can only achieve with age.  Love!

We cut the planks into 5 foot long boards, and then boxed them in with boards we cut in half, lengthwise.  We reinforced the table top from underneath with boards from an old picnic table (seen below).

For the legs, we used a big old pillar found by the barn, cut into four pieces.  And last, we cut more of the planks into 3.5 inch strips to use as reinforcements between the legs and the table top.

Tomorrow we need to putty up the visible screws and paint over the putty to match the wood.  Then we will seal the wood with a clear matte varnish/shellac, which will prevent splinters…or stains if we happen to spill on it, which I’m sure we will.

The result is the perfect combination of imperfection, age, and love with a classic table structure.  Did I mention…I love!?

Not bad for a first!  What do ya think!?

So we planted a garden

13 Jun

Well, before I get started…I know, I know…I have been bad about updating the little bloggity.  I’m sorry!

Things have been crazy busy, as we’ve been making big changes at Lifeworkmedia.  The business is evolving and growing and heading into all new territory and while it is exciting and I can’t wait to make the big announcement, I know I need to hold off until it is officially the “right time.”  Just know, you’ll be seeing a whole lot more from LifeworkMedia…(not just video production and graphics anymore).  Yay!

On a personal note, we’ve been doing a lot of evolving on the home front as well.  Here are a few pics of the garden we just planted last week.

Garden BEFORE picture:

Yes, there is a fenced in area in this picture.  Oh, and a little stone shed too!  Just completely hidden and overgrown.  This is how it was when we bought the house & property.  (you can just barely see the roof of the shed peeking out from behind those grape leaves…off to the left of the middle of the picture)

Garden AFTER pictures:

Oh hey!  A shed!

Lookit all the food!

Pretty neat huh!?  We’ve got:

4 diff. kinds of peas, including my favorite Edamame

5 kinds of cucumbers

2 kinds of corn

15 varieties of tomatoes

purple Eggplant

Red, Green, & Orange Bell Peppers

3 kinds of carrots

Broccoli

White & Purple cabbage

3 kinds of lettuce + spinach

Garlic

Chives

Artichoke

Zucchini

Acorn Squash

5 diff. kinds of pumpkins

potatoes

Cantaloupe

Red & yellow watermelon

Honeydew Melon

annd…I’m prob. forgetting something.

Yum…loving the idea of going out to the garden to pick anything we want for dinner or to add to a salad, without making a run to the store!!!  Fabulous!

Farm Chicks coverage- Day 1

4 Jun

“A Farm Chick is a girl who sees the world through rose-colored glasses.  She loves her family.  She laughs a lot.  She’s farmgirl meets Fifth Avenue and with a little style, she’ll change the world.”  -Farm Chicks Website

Today I died and went to Farm Chicks Fair.

Yes, it was pure heaven!  Now I’m so inspired to jump into my home remodel & design all over again!  I’ve kind of let that slide a bit as I’ve been so side tracked with work and all kinds of other things.

oh …and my poor husband has the longest honey-do list ever now…  ooops.  Gotta say, sometimes it is just really difficult for me to spend money on something I know I can easily make myself.  This is where my darn business & art degrees get in the way!  “Spend money?  Why would I when I can just make it!?”  But then my mom ever so kindly reminds me “Where in the world will you find the time!?”  True.  I think I have over 100 pictures of things I didn’t buy because I wanted to make them…still hasn’t happened.  Okay, that needs to change.

Here’s a recap of some lovelies my partner-in-crime (my mom) and I spied today.  Now let me just say….the lines…were long.  LONG! to get in today.  Even our “exclusive” line, where we waited for 30 minutes.

We were in a group that got to go in earlier than the general public (go us!) and STILL…by the time I eyed something I really couldn’t live without…there was already a SOLD sign on it!  Unfortunately, this just adds to the pressure to impulse buy, which I did.  But even now as I’m sitting in my mom’s living room looking over my purchases I realize…they are golden!  I hit the jackpot and walked out of there with goodies I am still happy with!  I. am. good!  No regrets.  Phew!

This is the line we were in to get in early.  The line for people that didn’t have tickets was a bazillion miles long! 

Almost to the entrance!  I can see it….

Oh my…what a lovely apothecary chest!  And HUGE too!  2.5 ft wide  x 5.5 ft tall and all for $195.  This would be great for an entryway or laundry room.  Little drawers for keys, gloves, mail, and all the junk I throw on my kitchen island.  Somehow I think my junk would look better in these little compartments.  Duh.

Nonetheless…I contemplated buying this for too long.  Came back 30 minutes later and it was sold!  sad!

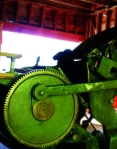
No, these are not just rotten old wheels.  These are casters!  And they are big!  And they are gold in the world of design.  Stick these on the bottom of a table, bookshelf, cart, or anything…and boy you have the perfect, industrial furniture piece.  $5 a wheel….and $20 later I walked away with a fabulous vision & new addition to the honey-do-list!  Priceless!

Art cabinet.  $225.  This might look brand-spanking new in this photo- but it totally exudes vintage charm up-close & personal.    Amazing!

Cubby cabinet.  $95.  Found in a 100 yr old barn!. I need one of these!  But this is one of those things I just have to make myself/have the husband make from some of our old reclaimed barn-wood we found on our property.  I couldn’t justify spending the dough when I have such a handy-man at home.

This was a fairly large cubby cabinet too, and for my purposes I would prefer a much smaller, counter-top-size find to hold postcards, letters, bills, and other mail.  At least it will look cute and organized that way.

Okay.  I saw this…and while it is a darling chalkboard that would look fabulous in my kitchen or dining room wall with possibly…a menu? dare I?…what was written on it was just too good to pass up and really made me feel good about any future purchases I was soon to contemplate.  Knowing he called…and gave permission nonetheless…perfection!

This is a tin pie box…$25…but boy…I could certainly see using this for jewelry.

LOVED this cart on casters!  $425.  Wouldn’t this make a fab kitchen island!?  Not to mention, those wire baskets are pretty unbeatable…like…say…on my fireplace hearth…

This hutch.  Dining room.  To die for!  $395.  I soooo sooo contemplated this!  Maybe tomorrow if it’s still there then it was meant to be… (sorry Baby)

Love these lights!  Over the kitchen Island?  Yes please!

This milk crate was in perfect condition and  SO beautiful!  $24.  Stack magazines inside this next to the couch…

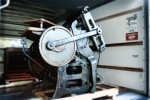
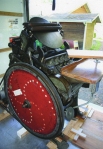
This was one of my favorite pieces in the whole show!  This thing is massive, original, and just gorgeous gorgeous wood with glimpses of the type/stencils left on each drawer.  Swoon!  And yet again…the casters just make it even better.  Yum.  Only downside- $895.  Wasn’t feeling that today.  Maybe tomorrow!  Hahah…I crack myself up.

Close up

1904 fireplace mantle.  $350, which is a great price!  I want it…but I already have one!  Put some candle sticks or books in the opening and you’ve got a funky twist to a classic piece.  Necessary.  Yes. 

Oh my.  LOVELY!  And it swings!!!  Ahhhh.  This would look so great on a charming covered porch.  Looks uncomfortable though and the price tag at $500 was a no brainer.  Couldn’t.  No…wouldn’t…do it. 

Epic picture fail…I know.  But if you can somehow look past that you can kind of see the fabulousness of this behind-the-couch table.  Adore!  Especially with a price tag of $150.

Close up

Hey!  Another cubby cabinet!  $90.  I sooooo love, and this time it was the perfect size for my counter top and all my trinkets & mail.  Cha-ching!

This bench.  $425.  Swoon-worthy!  Circa 1800’s, found in an Austrian estate!  Can I say amazing? 

Make a single, long custom cushion and voila…indoor couch for a sitting room.  Not to mention, this booth’s burlap pillows were fabulous.  I think this was the most popular booth at the show because of their pillows…but $60 a pillow!?  ouch!  Not even I could justify that one. 

I’m not sure what this is or how much it was.  Ooops.  I think it was a vintage piece with newly re-upholstered cushions…but mainly I put it up here because of its Chevron stripes print!  Love! 

These. Are. Amazing.  Antique oversize wine bottles & storage containers.  Oh Em Gee.  These things are MASSIVE!  About 3 ft tall & 1.5 ft wide.  And the metal baskets they are in…wow.  $150…which is a steal because I’ve seen these for around $400-500 everywhere else.  I think I need one tomorrow when I go back for day 2. 

Now…bear with me and think out of the box a bit…the glass bottle on the floor as a lamp base—metal post straight up—and then the metal basket, flipped upside down, and used as the “lamp shade.”  I know I’ve seen this somewhere…

Here we go…something kind of like this idea…but with those metal baskets instead.  Fab!

source

Another couple of apothecary chests.

This time a mini one!  Oh my.  This looks like jewelry heaven!  $85

And another huge one…for laundry room or entry way goodness.  $229.  The perfect “catch all” furniture piece. 

Of course….apothecary jars.  $24 & $12.  I went in with the goal of buying several of these for my antique fireplace mantel that the hubs randomly brought out of storage and thus, brought it back to life, into our dining room.  Yet I left with not a single one!  Not sure what that was about…but I’ll rectify the situation tomorrow at day 2.  Relief.  And no regrets. 

$32

A tool chest…turned jewelry chest?  $125.  Amazing!

Lockers lockers lockers!  Oh my.  I really would love this for my office.  $500.  Ouch.  But probably totally worth the pain. 

Huge vintage metal letters.  $30 each!  Such a fabulous price!  I wanted to get these for “LIFEWORK” but they didn’t have all the letters to spell it!  Grr!  Maybe I need just a big ole “M” for Marissa. 

Well, thats the end of Day 1.  We’re exhausted!  And yet…I’m going back tomorrow?

Of course!!

Coverage of The Farm chicks show- coming today!

4 Jun

I am SO excited to be on my little inspiration vacation to…well…my home-town.  But, much needed!

Just a little heads up:  I will be bringing you live (I will seriously try) coverage of the Farm Chicks show- a fabulous flea-market/antiques fair with tons of vendors from around the country!  If “live” doesn’t seem to be agreeing with me, my ipad, or my blog, which is totally likely to happen since a lot of stars have to align for that to work out, then I will certainly be bringing you after-hours coverage of the show.  Promise!  Check back today for some incredible awesomeness & to see all the vintage goodies I neeeeeed in my home!

I woke up way too early this morning with butterflies in my stomach.  Lines are supposed to be four hours long to get in today, but I planned ahead and bought tickets during the very limited pre-sale hours yesterday and hopefully that will get me right in the door and snapping pictures left and right for your amusement.  Best part is, I’ll be with my partner in crime- my mom!  We’ll be pushing our budgets beyond what we should!  🙂  Pray the hubs is happy with my finds!

I’ll be back!

Pinterest is the new gray

25 May

Okay. Pinterest. Is. Amazing.  and if you haven’t discovered it already, do so now!

If you didn’t already know, Pinterest is my newest life-consuming obsession.  It keeps me up in bed way too late at night as I click and click and one thing leads to another…and pretty soon my husband groans and rolls over because he knows there is no reprieve from the bright screen light.  And, no joke, Pinterest wakes me up in the morning when I roll over, eyes half closed, and blindly feel for my Ipad to slowly wake up to the magnificence that is inspiration, gorgeousness, and beautiful eye candy.  It is literally a picture universe…a treat for the soul.

Did I mention I ♥ pinterest!?  Do they make a shirt for that?

Here’s what it is:

A website where you can keep folders called “Boards” of images you find or take in one place (and organized however you want!).  It is an amazing place for creatives, bloggers, and anyone really, to find inspiration.  I use it for my work all the time!!!  Best part is browsing other Pinterest users’ folders and getting lost in the world of ideas and inspiration.  Follow as many people as you want because the more people or boards you follow, the more beautiful things you will see from them on your homepage when you sign in.  Truly, if you’ve wondered where you can find all kinds of things you will love and obsess over, Pinterest is for you.  Not to mention, this is a great way to look busy when you’re really not.  Oh shush, I know you do it too.

So what do you say?  Sign up.  It’s free.  Once you sign up, you’ll learn about the “pin it” button which is incredible.  You can hit the button when you’re on any website and it pulls up all the images on that page where you can then select the one you want to “pin” back to your board on Pinterest.  Share, collect, browse from there!

You can view my boards here to get started

Here are some (and this is truly just SOME, because I have TONS) of my favorites to show you the amazing variety of boards you can find on the site from fashion to food to wedding decorations to interior design and all things in between!  So Fab!

You can click on the pics to take you to the curator’s board.

FASHION:

INVITATIONS & SOCIAL PAPER GOODS:

DIY CRAFTS:

WEDDING:

INTERIOR:

Welcome to the club and to the world of late nights and non-stop clicking.  You’ve been warned!

Paper suite for photo shoot

20 May

A little follow-up on our Water for Elephants appearance on Justin & Mary’s blog-

Here are pics of all the paper goodies created for the shoot:

Water for Elephants sneak peek

20 May

Folks- I apologize for my severe lack of regular posts to the blog!  I’m horrible, I know!  I don’t know what has gotten into me other than being incredibly busy with fun projects and just not having enough hours in the day!  Plus, not to mention…on a darker note- my dad- a heart surgeon himself- had a heart attack this Wednesday night…and I flew back to my hometown to be with him.  All is well and he’ll be fine!!!  Yay!!!  But I suppose that’s not helping on the blogging front.  Here’s an update!

On Wednesday I was able to participate in the setup and styling of a mock wedding for the amazing Share the Love and Walk Through a Wedding tour by Justin & Mary. I got a glimpse from behind the scenes, rather than just handing my paper designs off to someone else to setup. And what do you know?…I loved being a part of the excitement!  Styling = fun.  Who knew!?  🙂

The setup was fab, the flowers were gorgeous, and of course the venue (Sodo Park) is amazing!  Sodo is a huge HUGE raw space with amazing windows, super incredibly high ceilings, and awesome rustic wood, beams, & paint.  I considered this venue for my wedding a couple years back.  LOVED it, but we ended up deciding we wanted a smaller space since we were inviting a small number of guests- no way we could have filled it!

On that point…the craziest part of setting up Walk Through a Wedding was realizing how big the space was compared to the sets we had staged.  I couldn’t get over how tiny & unimpressive our sets looked, even though they were fabulous!  What the heck?  But really, it’s all in the photography & how all of the details are captured…which leads me to my next point…

We were featured on Justin & Mary’s blog where they posted a sneak peek of the shoot for all to see (scroll down a bit on their page)!  Enjoy!  All the paper goodies & bunting you see (Kisses 5 cents) were my designs in case you care.  🙂  The whole thing turned out soo swoon worthy and gorgeous.  Love!

Paper goods for a themed photog event

11 May

Just got a request yesterday to design paper goods and accessories for the Spread the Love photography & wedding industry workshop tour, making a pit stop in Seattle.  The best part is the theme, based on the book & movie Water for Elephants.  Can I say yum!?  Yes please!

The photographers have a fab…and I mean FAB website.  Not to mention, I love how in all of my correspondence I am seeing “Yay” and “So excited!” left and right.  Makes me feel good to realize I am not the only one to use ecstatic, over-the-top verbage!  Hey, we love what we do!  Sha-zam.

We’re talking about dramatic, gritty, vintage circus-inspired goods & colors.  Here’s the inspiration board we were given to work with and the photog’s blog post about the theme.

Catch is, the event is next week and I have to come up with all kinds of goodies for it…on a really tight time-line!

Luckily, I’m collaborating with the fabulous Daniela of Bella Signature Design on this event and on a different circus-themed event in July, so I’ll be using a lot of the same details and designs we’ve already created, with a wee bit of tweaking.

Did I mention you should sign up for the workshop?  Well, here goes: you should sign up for the workshop!  “Walk Through A Wedding” spots are limited to 2o photographers per event, and the “Spread the Love” workshop is for any and all wedding industry professionals or business owners.  In fact, I would love to attend.  Gotta make that happen.  and go.

Images, designs, and more to follow after the event!

Thanks for tuning in.

Thank you!

10 May

Thanks thanks thank you to all the wonderful people who contacted me after our 25% off giveaway!  What a surprise!

To those I knew and those I just met…I am thrilled to begin working with you and to create the perfect design together.

And…while you have me…here is an image I found yesterday.  I just had to share.

Gorgeous, no?

source: Style Me Pretty

Our first “giveaway” to all our loyal readers

5 May

As I’ve seen all over the blog & design world…it is important to offer special “somethings” for those of you who make our blogs worthwhile-  our loyal readers!!

So, in honor of you…

we’re offering 25% off of everything to anyone who contacts us through the blog in the next 7 days for custom invitations, logos, business cards, branding & identity packages, or anything else you might be looking to create.  And this applies to letterpress too if you’re interested!  Which is huge!

Offer ends May 12th, so hurry on over and email me (marissa@lifeworkmedia.com) about your project & for pricing.   Secret word is “YAY” and I expect you to put it in that email somewhere so I know you found us through the blog!  🙂  Yay!

Looking forward to hearing from you,

-Marissa

Do-it-yourself wedding invitations…with a little help…

4 May

I’ve always loved the idea of do-it-yourself everything for a wedding, but realistically, most brides usually do not have the time or are not super creative…and even if they are creative…they probably don’t know how to use Photoshop to make their own images & layouts. For a while now, I’ve been meaning to add to my repertoire the option of semi do-it-yourself wedding invitations…or rather, more like “assemble-yourself wedding invitations”.

I LOVE this idea because a bride can still end up with beautiful graphics, layout, design, etc…yet save money by doing the assembly and buying the little accessories (such as ribbon, flowers, jewels) herself. Genius!

All this is to say…I recently worked with a super sweet client, Kristen, who wanted a vintage, zoo-inspired wedding invitation. She is definitely one of my favorite clients to date. I loved her ideas and how she wanted every detail designed for her wedding…all coordinating of course! Kristen sent tons of images of ideas, inspiration, and “looks” she was after for her invites, but the catch was her budget was limited and she really couldn’t spend much on them.

So, we decided to go the route of semi- do-it-yourself wedding invitations and it worked out fabulously! Kristen purchased gorgeous, dark silver envelopes & pocketfolds from Envelopments and deep, dark purple backing paper. I designed the invitation, the RSVPs, & the direction cards- plus little extras like drink tags and song request cards…and will be designing the table numbers & ceremony programs too. Kristen is a very creative bride; she knew exactly what she wanted, in a good way! One of the things she asked for was for me to design custom rubber stamps for her to use on the envelopes & other wedding paper goods. You can see the stamp design in the pictures below on the envelope, along with all the other goodies.

The invitation design I created focused on the vintage element- with the wide stripes and vintage shape. The zoo-inspiration will come in for the table numbers, where we will be incorporating vintage animal illustrations. So fun!!

Once all the pieces were designed and printed, I mailed them all to Kristen who assembled them onto their backing papers and into their envelopes. There you have it; do-it-yourself wedding invitations with a little help. If you are interested in this option for your wedding, please contact me for more information and pricing.

Pictures of Kristen’s wedding invitation below:


Hope you like them!

A letterpress sneak peek straight from my studio

2 May

Remember this big, old, honkin’ 100 yr. old thing I wrote about back in October?

Well…we’ve been printing on it a bunch…and I felt it was time for an update to my loyal readers.

Our most recent print job was printed on 100% cotton paper from Crane.  It is one of the most luxurious, softest, most gorgeoouus gorgeous papers I’ve ever worked with.  So obsessed.  Really, you can’t help but touch and feel the paper…not to mention…once it is letterpressed you REALLY can’t help it because it leaves such a rich, deep impression from the letterpressing process.  Swoon!

I suppose it’s time to show you a few pictures from our latest print job + a bit of description on the process.

1) For each color, we had a photopolymer plate made.  You can see what one looks like below.

For this job we did three colors!

Image Source: Elum

2) Next, we mixed the inks to get the exact right shades we were looking for.  One color at a time.

Image Source: nomadic

3) The first ink color goes on the press & rollers.  ALL pieces with that color are printed.

Image Source: Peas&Cornbread

Everything is cleaned off, then the second ink color is applied to the press & the paper pieces are put back in to add the 2nd color to them.  Same goes for the third color.

One of the hardest parts of the whole process is figuring out how much padding to add behind the paper so that when the plate hits the paper it pushes in…but not too much and not too little.  Too much and the paper cracks.  Too little and you can’t tell it’s indented.

Color differences, flaws, & other variations are part of the process of hand-made goods, and add to the appeal of letterpress.

Here’s an image of the layout of a completed invitation page.  We’re cutting these ones after, but you can cut before & then print.

Image: Lifework

Here’s a closeup of the invitation, so you can see the indentation and the reason letterpress is highly sought after!!!  GORGE no!?  You can see a bigger version if you click on the picture.

Image: Lifework

I plan to post pictures of the fully assembled invitations once they are completed, but I seem to always promise more to come soon…and so far I haven’t followed through very well!  I’m workin’ on it.

Now you see why letterpress everything is my new favorite obsession.  I hope many of my future clients opt to go for letterpress printing instead of digital!

Emersonmade

2 May

I’ve been a big fan of Emersonmade for awhile now, but I just recently found out that most people out there have not heard of them!  What!?

Well, in that case, here is a little Emersonmade love for you.

Their overall style is classic & simple with big style statements and pops of strong design.

I’m obsessed with their clutches!!!  See the doggie one above?  Oh my…

An inside peek at the Emersonmade studio below…

For a little more Emersonmade love, check out the recent Studio tour/interview here, from Brooklyn Bride.

Oh, and they make really cute little flowers!

If you’re into these adorable flowers, above, you will find more adorableness here!

And these “poppers” below…how fun would they be if worn on every guest at your wedding!?

That’s all folks.

HAVE A HAPPY MONDAY!!!

Beautiful lovelies

27 Apr

A little update to the

section of the blog.

Just a collection of some current loves.  Below are: things I need, gorgeous packaging, awesome products, great do-it-yourself tutorials, beautiful furniture, and maybe a few other things in there too.

You can click on the pictures to go to the source, buy the item, or view the DIY tutorial.  Just remember to hit the back arrow to come back here!


Book themed wedding ideas for the bookie, English major, or nerd couple. Yes please.

25 Apr

Oh mylanta.  I heard a while ago through a friend about a wedding taking place in a gorgeous, old, brick bookstore in my hometown.  This…is…fabulous!

On that note, lets look into some book-inspired, library themed wedding inspiration.  Yummy!!!

How about this use of old flea market books for table numbers!?

Jessica Claire

I think this would be a great centerpiece!  Though, maybe with flowers too!  Lovely.

We heart it

Such a simple reception centerpiece idea!  A stack of books.

We Heart It

Printed book cover table themes.  Soooo fabulous!  “Yes, you’re at the Fahrenheit 451 table.”

Wedding Wire

Use old, hollowed out books for wedding invitations.  Love it!

Two Upon Ten

book inspired invitation

Jeshurun

More bookie table numbers!

Sweetest Occassion

Old book pages for decorations

Green Wedding Shoes

More torn out book pages.  So neat!

Sweetest Occassion

Book escort card idea- each guest got their own custom bookmark marking which table to go to!

Wedding Wire

More wedding invitation books.  I. Must. Make. One.  Where’s that special client??

Merriment

Groomsmen’s gifts in books.

GH Kim

Another invitation in a book!

Looooove the “library card” look!

Polka Dot

Loving this ceremony bookcase setup!  Please do this for your wedding!!

Jessica Claire

Creative vintage wedding ideas

22 Apr

It probably comes as no surprise to you that I am head-over-heels in love, obsessed, & enamored with vintage goodies used as wedding decor.  I’ve long been an antique store junkie, and just wish so bad I was having my wedding again so I could do it all over in a totally different style.  Actually, I take that back…I loved my wedding…it’s more about how I never stop falling in love with new looks and ideas so, really, I wish I could have a wedding every year to do something new and different on constant cycle.  Hmm, I should talk to hubby about this…

So…vintage furniture used for wedding decorations- it’s nothing super new, but it’s unique, whimsical, and something your guests will swoon over- but never as much as I will!

If you need some vintage wedding ideas & help…lets start with where to get amazing pieces:

There are not a ton of places providing vintage furniture rentals, but they are popping up more and more.  If you’re looking for some, check out 1) Found– they have an amazing line of all sorts of accessories & furniture.  You can find any and everything through them!  2) Archive Rentals – A m a z i n g 3) MMD events– hard to view their products…but they have good stuff!  4) Rust & Lace– gorgeous!  Or you can find many online shops on Etsy for vintage & antique goodies!

Here are some inspiration pictures for you to visualize how to use vintage furniture & lovelies for your wedding.

*gift, guest book, & dessert tables

*lounge area for guests to sit at during reception

*ceremony seating (Maybe couches instead of chairs?  Yes please!)


*ceremony entrances & backdrops

*photo-booth sets or backdrops

*reception tables, decorations, & centerpieces

*escort card displays

*Just for decoration

This should help you have a great weekend!  Happy Friday everyone!

Ruffled, Found, Oh Hello Friend, Elizabeth Anne Designs, Jose Villa, Wedding by Color, Amy Atlas, The Amateur’s Dish, 100 layer cake, Enchanted, Green Wedding Shoes

It’s expensive…but you should do it

19 Apr

Can someone please do this and send me the pictures?  🙂

Pet Portrait Stuffed Animals

Or else, I just might have to.

Necessary office goodies

18 Apr

I need these for my office.  Yum!

Lace tape

Cox&Cox

Mini Lomo camera keychains

Not Cot

Custom hand-calligraphy stamps

Swiss Miss

Rustic wooden desk

Jason Home & Garden

All about print techniques book

Curiosity Shoppe

Oh deer, paper clips!

Emmo Home

Vintage stamps…a must for business correspondence

Anthropologie

Fabric tape.

Kate’s Paperie

These are amazing…

18 Apr

Happy Monday everyone!  Things have been super busy at Lifework Media; several invitations and video projects all coming due right around now (and yes, I will post them soon for you to see).  Makes for long days and not much “us” time…but I’m not complaining!

*** I LOVE MY JOB!! ***

I really do.  I’m so blessed to be able to make a living doing what I love, being creative, and making other people happy.  It’s true, I’m in the “happy business.”  I just realized this the other day when I started thinking about the people I work with who are starting businesses or growing them, or they’re getting married!  They want logos and business branding, and they’re excited about it!  Or, they want invitations and other paper goods for their weddings, one of the happiest times of their lives.  To be able to make people happy and put a smile on their face when they see my work…well…it makes me happy and I’m grateful for the chance!

And so, on a totally different note…I’m a voracious observer…obsessed (and I mean that in the best way possible)…obsessed! with all things pretty and inspirational.  Here are a few lovelies I needed to share with you:

Think of the number of books you could finish…

Lovely

I dream of this fridge one day!  Not sure which color I’d choose; they’re all amazing!

Paper flower downloadable template.  Amazing.  Must do.

I think I need this table.

Yeah, I guess I could live in this boat house

Swoon!  Cutest thing ever!

Book of the month clutches!  Oh my word.  I want one.  They’re all fabulous!

That’s all folks!

Sources: Coastal Living, Design Sponge, Sears, template: Etsy, Patterson, Desire to Inspire, Sister/Brother, Kate Spade

Weekend love

15 Apr

Happy Friday to my loyal readers!

Thought I’d leave you some love for the weekend.  See you Monday!

I want one…

Community Live

I would do this if I had an outdoor wedding

Oh Hello Friend

How cool is this record wedding invite?

Loving this downloadable compliment bunting.

Okay…cutest cake ever

Herriott Grace

Wow, this is gorgeous and paintstakingly detailed.

Love all of these escort card ideas!

A gorgeous hand-cut paper creation

Vintage Hawaiian Invitation mockups

15 Apr

One of my current invitation clients is a super artsy, creative couple planning a wedding inspired by South Pacific, theater, and vintage Hawaii.  SO FUN!  Their colors are a variety of lavenders, corals, pinks, creams, and greens….very tropical.

We came up with the idea of a movie poster-inspired invitation with a vintage postcard, South Pacific-ish artwork, and a vintage map.  All the pieces will be enclosed in a gorgeous light pink fold out and a lavender envelope with coral hand-calligraphy on the front.  Not to mention…the full suite will incorporate lace, flowers, and ribbons as well.

Here are some mock-ups of this fun, whimsical invitation.  Names, addresses, etc have been changed.

Pictures of the real thing will be posted first thing next week.  This weekend is booked with printing, cutting, assembling, tying ribbons, and stuffing envelopes.  Lots to do!

HAVE A WONDERFUL WEEKEND!!!

you need barn doors…

14 Apr

Pure fab.

Yes, barn doors are nothing new…but I had to post on it!

I think a rustic barn door or a brand-new painted barn door are gorgeous for closet & bathroom doors.  Barn doors add a touch of style and personality to any room!

Or, if you have a big opening into a room, think about using several barn doors together to add the option of closing off rooms, without the permanence of a small door frame, while leaving the option for keeping that opening open whenever you want.

Down Whimsy Lane

Ribbons, streamers, & fabric strips are gorge

12 Apr

I am so inspired by the absolutely creative and beautiful use of ribbons, streamers, and strips of fabric for wedding & event decor.  Yes, even streamers!  If done right, they can be whimsical and elegant, without even a hint of tacky.

Think of using ribbons etc to make bunting, a canopy, a ceremony or photo-booth backdrop, a chuppah.  Or hang above the head table for the reception, on the bride’s & groom’s chairs, or from trees.  This is a super simple, cheap, do-it-yourself way to bring your wedding colors to life!

Whatcha think?

The TomKat Studio

The Loveliest Day

Project Wedding

Amy Atlas

Simple Wedding Guide

Merriment Events

Elizabeth Messina

Once Wed

Elizabeth Anne

Intimate Weddings

Project Wedding

Sweet Designs

Make Merry Events

Elizabeth Anne Designs

BridalHood

Ruffled

PhotoJoJo

100LayerCake

Swings swings!

11 Apr

I posted a picture the other day of an indoor swing (which I must do in my studio someday!) and loved the swing idea so much…well..

…now…I’m on a kick about swings

so,

here are a couple more swing inspirations I found today that I love!

Pure Green

Wow.  I want this on my porch.

Pie Wacket

What do you think of this piano?

10 Apr

Oh my gosh!  This is sooo cute!!!  I love it…I think…

I have an old piano that I don’t really like.  Maybe I should paint it?

Prob. not this color but…what do you think of painting it…??

Classy Clutter

Printed blouse

10 Apr

Must have.

Zara

I would live here

9 Apr

Dreamy.

Sweet Home Style

Tin cans used as vases & centerpieces? Yes please.

9 Apr

I love the use of cans for vases!  It’s such a simple, down-to-earth statement, yet so elegant too!

These are just gorgeous!!!

Green Wedding Shoes

Things you will love; from a colorful rug to a cute hairstyle

9 Apr

Love this office.  Especially the super happy, colorful rug which I want.  Anyone know where it’s from?

UnPlugged

This makes me smile.  And I’m not sure if it’s the mirror or the sweet little girl.  But either way, pure happiness.

Martha Stewart

Oh my…

Apartment Therapy

Adorable!

Once Wed

I’m SO going to do this come Christmas

Wedfully

Chalk walls!  Adore.

And this headboard…

Need I say more?

Everyone needs a quiet little reading nook

3.bp.blogspot

One of my fav hair styles.  Must do more often.

Style Me Pretty

Need this in my future studio in the barn, especially the swing!

Giants Live

Hope you enjoyed some of these beautiful things!

Photo booth backdrop

8 Apr

love!

Style Me Pretty

Wallpaper you can color

7 Apr

Hey Awesome

Graham & Brown


The best of Etsy

7 Apr

I’m going to start a new theme post displaying some of my favorite Etsy finds.  In three, two, one…

Presenting: The Best of Etsy.

There is so so much to shuffle through on the site I figure this will be an easy way to discover great products & shops in one place.  With tons and tons of junk on there finding treasures is sometimes time-consuming!

I am notoriously bad at sticking with things, I think because I have way too many creative things going on up in this hard-drive of mine, so forgive me if the best of Etsy posts are rather sporadic for now.

Here are some fabulous VINTAGE FINDS:

Egg crate

via the BellaLulu shop.

Viewfinder

Ethanollie

Blue Bell Bazaar

Happy Saturday- thought you’d like these links

2 Apr

Check out these super cute Hand Printed goods

You will find cute little luxuries in this E-zine

How about these adorable cake stands, plates, and more

Antique skeleton key necklace

Here are some beautiful and tasty treats

Pom Love

Have a happy weekend!

Circus-inspired packaging

1 Apr

I love creative and eye-catching packaging design.  So much so in fact, I am often the victim of advertising…or rather…of cool packaging.  If something looks fabulously amazing on the outside, it has to be amazing on the inside too!

No, I don’t actually think that.  But, nonetheless, I really do enjoy buying something simply for its appearance.  I guess I never learned the “It’s what’s inside that counts” or “Don’t judge a book by its cover” lessons  🙂  Okay, not really…I value those morals as well…but when it comes to work, and design, and inspiration, and eye candy….all morals are out the window!  🙂

Here is some circus inspired packaging I spied for three flavors of gourmet popping kernels called Carny Corn.  The designer, Theresa Decker, decided to create a circus side show act theme including Buttery Bessie (world’s fattest woman), Firey Hot Frank (fire breather) and Sweet & Salty Pip and Pop (siamese twins).  She used vintage broadsides as typographical inspiration and manipulated black & white imagery for each label.  The bags are printed canvas and are held in a custom made wooden crate with transferred typography.

It’s so creative and so cool looking I would definitely be tempted to buy this popcorn…even though I rarely ever eat it.

Obsessed with this Easter egg contest

1 Apr

Check out HATCH.

Now that I’ve discovered this, I simply must enter.  Yes, I’m a dork.

I’ll keep you posted!

Confession: I spy, sometimes.

31 Mar

Yes…I am one of those people that can’t get enough of seeing people’s homes.  My mom and I used to spend hours…days…driving neighborhoods and pointing out the best, most fabulous houses we wanted “someday.”  But, the fact of the matter is, you really don’t know how fabulous a home is until you see the inside.

Unfortunately this habit has resorted to me pulling my poor husband into my schemes of “the house is vacant!  We must go peek in the windows!” and even once, “Let’s hop the fence, NOBODY lives in the house” to which, we got caught and embarrassingly talked our way out of it by proclaiming to the home-owner (with video surveillance on the property) that we were just SO in love with the house we had to see it for ourselves.  Luckily that turned into a private tour.

So…all this is to say…I have a horrible habit of peering into people’s windows at night as my husband drives the car quickly past.  Yes, I am a snoop, a spy, and I might even be pushing the law a bit.  I’m sorry, but how…how…can I possibly resist that peek into the inside of someone’s illuminated house where I’m sure to see amazing architecture, design, & inspiration!?  I can’t.

Needless to say, I have found a few online solutions to curb my intense desire to call up my real-estate agent and beg her to give me a tour of some of the houses on our street.  If I am able to look at the beautiful interiors of enough homes online, I just might be satiated enough to forget about those houses down the street that are calling my name.

Here are pictures of a sculpture artist’s home & studio.  I feel so privileged to be able to see inside this home!  It’s like I’ve been given a VIP pass into the most intimate, private world of this artist, his studio.  *excitement*  This is perfect inspiration for what I want my studio/barn to look like someday!

Hope you just fell in love, like I did, with this charming, adorable, rustic cabin!  Makes you want to give up livin’ the good life with workable plumbing to move out to a little cabin where you appreciate the raw beauty of things.  Fab.

Gorgeous business identity suite

31 Mar

I love when I find amazing brand packaging!  This is a gorgeous gorgeous business identity suite for Jackie Wonders, a wedding photographer I spied online.  When the Lifework make-over is all complete (I hope by the end of summer!) you’ll see a lot more paper goods & business identity products from us like the ones below!

Enjoy:

It’s amazing how just a simple little pattern can actually turn into a real statement piece when done right.

Oh my word…love the real feather used in her packaging.

So simple.  Just a pattern and b&w text, but it sure pops!

Gorgeous!  And even the twine & string are essential to the overall look.

A look inside the studio spaces of some very creative people

30 Mar

I’ve always loved peeks inside of artists studio spaces.  They are usually so eclectic, and all are different.  Every year in my town there are two days where you can “tour” participating artists studios, view demonstrations, and purchase art.  It’s fantastic!

So, on that note…have you ever heard of Where Women Create magazine?  It is a fabulously inspiring look into artists studios!

The magazine showcases successful creative businesses owned by women.  If that’s not good enough…it also shows pictures of their studios, lofts, home offices, etc…and they are all incredible!

Image: Where Women Create

Makes me want to get on top of setting up my office in the little cabin we have on our property.  …And setting up my letterpress shop in our barn.  Can’t WAIT for summer and warm weather so I can begin these projects!  Once the Lifework Media make-over is all complete, maybe we’ll even sign up to participate in the artists studio tours for next year!

Enjoy!

Decorator Concept Shops

30 Mar

Anthropologie, one of my favs, just launched new workshop style shops where you can get help with design, while shopping for your house.  These workshops are to help inspire ideas, spark creativity, and offer up resources presented in a way to help you with styling your home….plus access to sample books, decorating assistance, and previously online-only products including wallpaper collections from Cole & Son, Tracy Kendall, and others.  In-store workshops will host design experts and special events, and product information and resources will be on hand for shoppers.

The new quarterly Anthology Magazine (*yippeee*) will also be available at these workshops, which are available in 11 U.S. cities and in London.

• Atlanta, Georgia
• Beverly Hills, California
• Chicago, Illinois
• Corte Madera, California
• Denver, Colorado
• Houston, Texas
• London, United Kingdom
• Miami, Florida
• Nashville, Tennessee
• New York, New York
• Wayne, Pennsylvania
• Westport, Connecticut

Images: Oh Joy

If you don’t live close to one of these eleven locations, the decorator concept is also available to all customers online with the decorator shop online!  *yay!*  The interactivity of the online feature is wonderful!  If you’re anything like me, easily overwhelmed with all the gorgeous options out there, then you’ll definitely appreciate this.

It is full of decorating tips for decorating with hardware , area rugs, wallpaper, other textiles, and more…and all presented with beautiful graphics.  Plus, the site makes it super easy to order swatches in wallpaper, fabrics, etc (for free!).  …AND…there’s even a glossary for those of you who don’t know some design-y terminology.

Happy decorating!

Adorable little fabric flowers tutorial

30 Mar

I love fabric flowers and never knew how to make them, so yep…you guessed it…I researched it and here’s what I found:

An awesome video & photo tutorial via Cherry Street Cottage.  Check it out!

Ruffled curtains are gorg

29 Mar

Image: Desire to Inspire

Oh my!  I am in love with these!  Must.  Make.  Soon.

The end.

Here’s how to make your own Terrarium (a self- sustaining garden)

29 Mar

I’ve always loved terrariums, but lately they’ve stormed the design and blog world with a frenzy so now I am set on bringing these little self-contained gardens to my readers!  Not to mention, a friend asked me the other day to write a post on them for her…so here you go!

A terrarium is a collection of small plants growing in a transparent, sealed container.  It is a closed environment, and can actually be used to illustrate how an ecosystem works!  Pretty amazing stuff!  Inside a terrarium’s walls, many different natural processes may be observed: such as photosynthesis, respiration, and the water cycle.  The water in the terrarium is constantly recycled.  As the moisture in the air condenses on the glass walls, it returns to the soil and is absorbed by the plants’ roots.

Image: Katy Elliot

All that is to say, terrariums are the perfect garden for any of you urban city dwellers desperate for a little green.  …Or for those of us who tend to neglect our indoor plants, ie: me.  Oops.

Many people have tried and failed at creating successful terrariums.  Here’s how to proudly accomplish your terrarium endeavors!

This diy terrarium video, created by Sprout, is the ultimate helpful tool in creating your own DIY terrarium.  Below, the steps and details are written out for you…but I recommend starting with the video.

You’ll need:

Clear glass or plastic container. Here are some awesome terrarium containers (scroll to the bottom), or apothecary jars, or you can use something you find around the house. Continue reading

Charming Barn Wedding Ideas

29 Mar

Recently, my friend asked me to help with her wedding.  She’ll be having her wedding ceremony at a beautiful outdoor location- with never-ending, rolling plains surrounded by gorgeous gardens & flowers.  Her reception will be in a huge barn on the property.

From what flowers to use for her bouquets to what she should do for centerpieces…she is overwhelmed!  In terms of a “theme” or “style”…there is none.  Yet!

However, she has picked her colors; coral, gray/silver, & cream- fabulous!

She was not one of those girls with ideas for her wedding when she was ten.  I’ve always thought she was stylish, and talking with her made me realize she just needed some help gathering ideas & inspiration to execute her style and help her figure out what she wants.  I think she knows what she likes and just doesn’t know how to explain it or isn’t able to put her finger on it.  I’m positive when she sees the right thing she will say “yes, that’s exactly what I want!”

Do you ever have that problem?  If so, I would love love to collaborate with you or your vendors to help you come up with the “whole look” for your wedding.  Usually, once you have an idea of how the end result should look it is much easier to find & pick items that execute that look every step of the way, especially if you let me help you with a list of what to buy!  🙂

Email me/leave comments on the blog if you have any questions or need design help for your wedding!  Or keep visiting this blog for more inspiration.

Here are my ideas, loves, & obsessions that I think would work great for any budget-friendly barn wedding, in case you are thinking of having one too:

1) THEME-   in other words the look, feel, style, and tone

You don’t have to go “country” to pull off a fabulous barn wedding.  Think  “Elegant-Vintage-Garden-Chic”…yes…a term I coined, I think, unless it’s out there somewhere else.  *eek*

The long name has its purpose though!  I love the use of vintage-inspired elements in weddings these days.  I have to say it is one of my all-time favorite trends right now.  But, unless you’re really big on vintage antiques and shabby chic finds, you should mix in a few other elements.  That’s totally not required though (some ALL vintage-inspired weddings I’ve seen are still at the top of my list)  However, a mix & middle ground is the way to go for most people, so that’s why I want to add a bit of elegance (which can be more formal & glitzy) with a bit of garden (which is soft, romantic, & natural) and a touch of chic (which is trendy and stylish).

Below, you’ll find some inspirations that are Elegant, Vintage, Garden, or Chic…or a mix of several of these.

2) BOUQUET & CENTERPIECE FLOWER OPTIONS

Wedding flowers are tough to figure out because there are just so so many choices out there.  For the long winded (take a *deep breath*)  “Elegant-Vintage-Garden-Chic” look there are plenty of options to go with.  While my all-time favorite is the Peony, I’m also obsessing on Ranunculus & a variety of heavily petaled roses & open garden roses (there are tons!).  You can see them on my recent post on flowers.  I would create my bouquet & centerpieces with at least some of these “soft” flowers if I was doing a barn wedding.

See how romantic and full the “heavily petaled bouquets” look?

Images: Emily Rose Wood, Country Living, Angie Silvy

I’m also really digging the “just picked yourself” bouquet look.  It is down-to-earth, natural, completely budget friendly, and understated (in a good way, yes).  Can you see how these bouquets below look like they were just picked out of a garden?  Some actually were!  And others were Continue reading

Wooden headboard

28 Mar

Yes, it’s a bit weird that the most random things give me inspiration!  Ideas are a flowin’!   …I’d love to do an invite in this kind of style…

This is the simplest headboard to make.  And when paired with clean, modern bedding it is perfectly sweet, rustic, charming, and earthy all in one.

Source: House Tweaking

Use flush mount hangers (you can find them at ACE Hardware, Lowes, etc) to attach to the wall & to the boards.

Gorgeous!

Idea to steal: fabric strip canopy

24 Mar

By far, this is one of my favorite things to date.  This is an absolutely gorgeous wedding detail.  It is made from cut strips of all kinds of different fabrics in this couple’s wedding colors.  Just think of the possibilities!

This probably took a ton of time and effort to create…but it was so worth it.  Wish I could re-do my wedding just so I could have one of these defining a lounge area.

I would love to use this for a ceremony chuppah, photobooth backdrop, or even as a decoration above the head table.

Truly unique, colorful, and gorgeous and sure to please your guests!

sources: Sloan Photographers, Ruffled

A little Anthro love

22 Mar

This is nothing new.  Anthropologie has the most amazing window displays.  I am constantly in awe of their incredibly creative use of materials and you’ll find me standing in front of their windows for at least ten minutes if I happen upon one.  Obsession.  Not to mention, their store is pretty incredible too with its eclectic, hand-made, cultured, & earth inspired goods.

Thought you would like to see some of my favorite window displays for a little Tuesday love.


Ribbon decor is popping up everywhere!  Even wedding design!  Love.


Um.  Can I just say wow?  This is gorgeous!!!  Upon further research I found they used white cotton material & dip dyed it into buckets of all different colors, which they then sewed into ruffle strands and hung.  Now, this might seem out there…but how about that for a ceremony backdrop – or a canopy/tent/chuppah in your wedding colors?  Yummy.


Gotta love the creative use of books.  In fact, that’s a future post I must do.  Books used in weddings.  It’s been done!


Love love this colorful use of balloons.  So simple yet so vibrant.  How about doing a wall of balloons like this for your wedding- with names & table numbers written on them for escort cards?  Sounds good.


Who knew those paper chains we made as kids in elementary school could be so beautiful!


Or Marshmallows for that matter.


An ornament tree!  Oh mylanta. That is incredibly beautiful & creative!

Now…these sorts of inspirations are what cause major overwhelming excitement for me and drive me to proclaim “why aren’t there more hours in the day!!?”  My poor husband and all he deals with.  This ornament tree is too good to pass up.  Can’t wait for Christmas time and my own attempt at this creation.

Sources: Feminine Modern, Creative Juice, Fairy Tale Wishes & Dreams, 100 Layer Cake, Katie’s Blog, 2Sisters Blog, Design Sponge, The Outpost, Thunder in our Hearts

P.S. each and every Anthropologie store has it’s own team of designers, artists, graphic designers, builders, & dreamers to come up with and create these incredible displays.  I wish I could do this job!!!  Someday?  Yes please!

Blink Lash Bar update

20 Mar

As promised, I’m following up with a post about my recent clients over at Blink Lash Bar.

They have officially started business in the hip Capitol Hill district of Seattle.  You can check out their website here.

This is taken from their site:

“At Blink we specialize exclusively in eyelash extensions. Whether you are looking for a casual look, lashes for a special day or for all the glamorous who want that WOW look every day, Blink professionals have a skilled technician that will customize the perfect look for whatever you strive for.”

They also have a service called “Lash Dips”, which is a semi-permanent (6 week) product giving your eyelashes the look of mascara that is applied perfectly.  This sounds so fabulous…I might just have to go try it myself!

Here are some pictures of their location, including two displaying the logo we designed for them- front and center on their door & sign!  How cool!

Simple photo displays for your wedding or home

18 Mar

If you were just going to disregard decorations due to budget constraints, think twice before you do so!  There are budget friendly, do-it-yourself options so your wedding can still scream “you”.

Here is a great, cost effective way to decorate and personalize your wedding…**without breaking the bank**…at all!

Images: 1::WeddingChannel.com 2:: unknown.  sorry!  3:: Elizabeth Messina 4 & 5:: U Make Me Smile

Start by gathering your photos. Engagement pics, old photos of the two of you together, and childhood snapshots.  Maybe even pictures of your parents ‘ & grandparents’ weddings.

You don’t have to use the originals if you don’t want.  Visit a photo kiosk at your local drugstore or photography shop where you can make high-quality copies at a reasonable price.

Then, you can either attach the photos to different-sized pieces of cardstock (like they did in the 1st photo above) using photo corners or special photo glue (or use just the photos themselves) to clip to long strands of rope, twine, ribbon, wire, etc using clothespins or metal clips.  You can use stakes to attach the string, or wrap it around trees, or even just use push-pins in the wall and wrap the string around those.

Here is a great tutorial on customizing your clothespins I found at Creature Comforts.  The photo below shows a couple pins with fabric on them, which is a great great way to add in another splash of your wedding colors.

Source: Creature Comforts

And below are a few more photo display ideas, designed for use in your home, but I think they would be fab fab for your wedding too!

That heart…what an adorable way to collage your pics for your wedding!  I can picture it on a barn wall, or what about on an old, rustic door leaned up against a wall?  Cute!

The glass vessels with black & white photos in them are pretty swoon-worthy too.  How about using this idea for your centerpieces on each table?

Source for photos above: Merriment Events

Or old vintage bottles (like the ones above) for your centerpieces…or grouped on the tables next to the guest book, cake, favors, etc.

Source: Hatch Creative Studio

This is just wonderful!  I love the use of old frames  in any shape or style (all painted the same color to give them some cohesiveness) with pictures inside.  It looks like they just glued or stapled strips of ribbon to the back of the frames, and then used mini clothespins to attach pictures to the ribbons.  LOVE IT!  You could hang the frames to the walls of your venue, or simply just have them on tables leaning against the walls instead.  ORRR…maybe you can hang the frames, using clear fishing line, from the rafters, trees, or ceiling…like this gorgeous wedding photo display below…

I’ve seen this idea everywhere and just LOVE it!  I’m obsessed with hanging decorations!  And what’s so great about this last one is they just used their pictures from home, frames & all, and hung/tied them using invisible line.  How simple is that?

Welp…that’s it for now!  With any of these ideas you’ll have a completely personalized, custom decoration that looks beautiful and can cost next to nothing!  Not to mention, your guests will love looking at all the different images of you guys before the ceremony or during the reception.

Check back for more budget-friendly, DIY decoration ideas to be posted soon!  In the meantime, head on over to our recent bunting post for another creative, low-cost, high-style idea.

Awesome popsicle stick wedding paperie

16 Mar

Loving the fun, creative use of popsicle sticks for wedding menus, programs, etc.  I want to design these for someone!!!

How fun!!  A custom crossword puzzle for guests to do while waiting

This is a great idea…loving the pictures of all the people in the wedding party on the program

Hand-painted portraits of the wedding party are printed onto programs.  So amazing!  Call me and I can make something like it for you!

Oh, and there are other uses for popsicle sticks at a wedding too.  Stir sticks anyone?

Credits: Ruffled, Martha Stewart Weddings, The Knot, Elizabeth Anne Designs, Kelly Hicks Design, Rifle Paper Co., Baum Birdy

Cheaper peony “replacement” flowers for your wedding (and garden too!)

15 Mar

Peonies…one of the absolute most gorgeous flowers out there!  They are loved for their large size and their very high petal count, making them very dense and soft looking.  Unfortunately, they are fairly pricey…especially if they’re out of season.

If you’re working on a budget or if your wedding is not during peony season don’t fret….you can still get gorgeous, full, high-petal-count flowers that will give the same look and feel as peonies, without the expense.  These are also great additions to any garden.

Here are some alternate flowers to look into:

Ranunculus


Sources: Bulbs Online, BHG, Lovely Little Details

Gorgeous gorgeous gorgeous & they are uber trendy & stylish right now for weddings

Double Flowering Tulip


Sources: Wedding Bee, BHG, White Flower Farm,

Tell me those don’t look just like huge, round, peonies…

Cabbage Rose, Juliet Rose, Eden Rose


Sources: Jackson & Perkins, Cut Rose, Martha Stewart Weddings, Wedding Flower Ideas

Any of those roses, all of those roses, are super high-petal count, super dense, super soft & romantic looking…so don’t write off roses!  Let me just say, there are TONS of rose varieties out there that are not your “typical” rose.

Also, check out these rose varieties below:

Pope John Paul II Hybrid Tea Rose

Florence Nightingale Floribunda Rose

Sweet Intoxication Rose

Miranda (Ausimmon) Rose

Patience Rose

Phoebe Rose

Rosalind Rose

Astrid Graffin Von Hardenberg Rose

Hope this helps with your flower search!

Here’s how to cheaply & easily revamp your lamp base for a new look

14 Mar

I’ve searched high & low for the perfect gourd lamp for my house.

If you don’t know what a gourd lamp is- here are some in the image below:

Source: Garnet Hill

And they are $230.  Most of the other gourd lamps I found were all at least $150.  If you’re anything like me…I’d rather spend that $150 on, well, pretty much anything other than a little side-table lamp.  So how about buying a cheap gourd lamp, or any lamp with a great shape,  (think: Lowes, Home Depot, Ikea, TJ Maxx) and painting it the exact right color you want?  Or, revamp an outdated brass (or any *ugly*) lamps you own already.

Here’s how with this brilliant tutorial I found on Isabella & Max Rooms.  This is so simple, cheap, and failproof!  I can’t wait to do this to my own lamps at home, hidden in the storage closet, that badly need to be brought into this decade.

Here are some dark blue gourd lamps found for $39 that didn’t match Janell Beals’ bedroom decor.  So instead of giving up, she gave them a make-over!

First, wrap & tape the socket and cords with plastic to protect them from getting covered with paint

Second, spray the lamps with Rust-Oleum’s White Primer.  Wait for the first coat to dry, then apply a second coat to make sure your original color is completely covered.

Third, between any applications of paint, lightly sand the surface with 220 grit sandpaper, removing any little bubbles created by the spraying process.  Wipe down with a cotton rag after sanding to remove all dust.

Fourth, 24 hrs later, these lamps were sprayed with two coats of Rust-Oluem’s Heirloom White.  Rust-Oleum has plenty of other gorgeous colors!  Just make sure your primer is 100% dry before applying your color.

Last, spray the lamps with Rust-Oluem’s Clear Protective Finish in Gloss.

And voila!  You’ve got a gorgeous new lamp base in any color you want!

I love love the result!

Pictures from Isabella & Max Rooms.

Thanks to Janell Beals for her incredibly creative inspiration!

Creative, miniature bunting cake toppers you can do yourself

14 Mar

More of the fabulously fun & stylish bunting trend.  Are you sick of it yet?  Hope not, because there’s still more to come on this blog at a future date.

I love the idea of bunting on a cake!  Such a festive, celebratory embellishment.

M Sweet Desserts

Vintage Magpie

A Subtle Revelry

Kiki La Ru

Kiki La Ru


What do you think of this new trend?

A source to find any & everything!

12 Mar

I visited one of my favorite sites, Green Wedding Shoes, and saw their recent post of a wedding decorated with paper lanterns shot by photographer Tanja Lippert.

Green Wedding Shoes

Isn’t that just gorgeous!!!?  Not only is the barn absolutely stunning with its cathedral-high ceilings, but that burst of color in the middle from the hanging lanterns is so modern and playful, such a perfect juxtaposition with the dark, rustic elements of the barn.

More pictures of this gorgeous, colorful barn wedding  shot by Tania Lippert below

If you’re looking for these lanterns, check out Luna Bazaar.  Jen Campbell at Green Wedding Shoes loves Luna Bazaar.  And so do I.

In fact, the hubby and I ordered some glass vases from them for our bookshelf a few years ago.

They have EVERYTHING you could ever want for your wedding decor, and all at great prices.

Here is a picture of a gorgeous wedding display using some of Luna Bazaar’s glass vases (see link above)

Green Wedding Shoes

And here is a spread from Better Homes & Gardens magazine on these fabulous glass votives.  They would be great on a table surrounding the guest book or as centerpieces for the dinner tables at your wedding.  Or…at home, on the mantle.  Or maybe for your wedding and then at home after.  Reuse!  *smile*

And look at this picture I found at Classic Bride of Luna Bazaar’s beautiful linen & wire lanterns.  They don’t look particularly special on their site, but look how absolutely gorgeous they are real life below!!

Here are some of my other favorites from their site.  ANY of them would look great at your wedding.

1::  Rattan Ball String Lights– these would look beautiful strung kind of low between trees outside or between tall posts outside your reception entry

2::  Colorful Paper Parsols– they have tons of different colors & even different shapes

3:: Round Hurricane Lantern– use some on each stair tread, lining both sides of the aisle you’ll walk down, one at the end of each row of seats during the ceremony, or even hanging from the trees or tent.  Try grouping three together as a bunch, and then re-use them from the ceremony to the reception for the centerpieces.

4::  Lotus Flower Candle Holder– I love love love these so much!  I can see using the fuchsia, red, and orange ones together in a moroccan or indian inspired wedding.

5:: Mercury Glass Votive– these can be both very formal & elegant, or surprisingly…even rustic and vintage, depending on the rest of your decor.  I can picture these in a barn or garden theme wedding, with other vintage & rustic elements.

6:: Eyelet Paper Lanterns– what I love so much about these lanterns is the absolutely beautiful light & shadow display they create.  The light from inside glows through the holes cut into the lanterns, and it is gorgeous gorgeous gorgeous!

Those are just a few of the many beautiful pieces from Luna Bazaar.  If you haven’t been over to their site, you must check it out!  At first, it might be a bit overwhelming, but it’s worth the digging.  They have one of the biggest and definitely one of the best collections of accessories & decorations for your wedding, event, or even for your home.

Hope this source helps you!

Should you paint your wood floors or is that blasphemous?

10 Mar

The clouds have parted and the sun is shining down upon *dadada daaa* the next trend I bring you…painted wood floors!  They’re striking, fascinating, awesome…

Or are they?

To tell you the truth, I am very torn about this trend.  I love wood floors.  Real, original, rich wood floors- especially rustic or dark wood floors.  Yum.  So the idea of painting over those floors, permanently…well, it kind of makes my stomach knot up with guilt.  And I’m not the only one.  This trend seems to bring a mixed bag of feelings for everyone, and there are heated conversations all over the web about it.  Yikes!

However, being the moderate, well-balanced, and in-the-middle gal I try to be, I do also think painted wood floors are quite fabulous!  In my opinion, I believe if your wood floors are in bad shape & need to be re-done anyway then you should go for it  and not feel guilty!  Painted wood floors can be elegant or funky, bold or understated.  They are really versatile.  Thing is, I don’t think this trend is for any house, any room.  I think it works in some houses, some rooms, some spaces.

My very general guidelines for the go ahead on painting your wood floors is for use in:

– cabins

– beachy, rustic, or old (100+ yr old) homes

– eclectic, one-of-a-kind homes

– artist, designer, or photographer homes & studio spaces

– guest houses

– very contemporary homes

– offices

– kids rooms

– sitting rooms

If your space doesn’t fit into any of those categories, don’t get me wrong…it might still look amazing with a painted floor.  Or, maybe you’re just looking to make a statement, because a painted floor will.  If so, I applaud your gutsiness and chutzpah.

By the way, you can paint your concrete floors too!  Think patios, porches, & basements.  Yum!

Here are some of the best in painted floor designs

Wide Open Spaces

Wide Open Spaces

Wide Open Spaces

Material Girls Blog

Times Union

Better Homes & Gardens

Down & Out Chic

Design Amour

Living Etc

Apartment Therapy

Studio Nico

BEFORE

Grace Designs Dallas

AFTER

Grace Designs Dallas

Grace Designs Dallas

Here is a great tutorial on how to paint your floors and what kind of paint to use.

Oh, and never paint on a wet day!

Lifework at the Fairmont Hotel Event (menu, seating cards, & favor tags)

9 Mar

As promised, I am following up with the actual event pictures from my post on my Fairmont Hotel paper goods.  I can’t believe how beautiful the tables turned out for the Forever Fairmont event at the Fairmont Hotel in Seattle.

Just got the pictures of the decor (including my paper goods!) Love love the way the menus & seating cards play off of the gorgeous flowers, linens, & table decor designed by my friend and one of my inspirations – the incredibly fabulous Daniela at Bella Signature Design.

Chalkboard inspiration you can steal

9 Mar

I LOVE chalkboard everything, so I’ve decided to gather a collection of the best chalkboard inspiration out there.

This is a must for a wall in my 100+ yr old home in the near future.  Just have to get around to doing it!

The best thing about chalkboard paint now is it doesn’t have to be black anymore.  At the bottom of this post you’ll find information about making your own chalkboard paint in ANY color!

Image: Magnetic Chalkboard Paint

Image: Style Files

Image: House Obsession

Image: Living Etc.

Image: Design Sponge

Image: Chelsea Connolly

Image: Michelle Lunt

Image: House of Chic & Penoche

Loving the trompe l’oeil idea!

Image: Swatches & Switches

This image above made me think about headboards.  I would love to paint the wall behind my bed with chalkboard paint, and then draw a gorgeous elaborate headboard on there, and change it up whenever I feel like it!!  Only problem is the pillows and the chalk being rubbed off.  But it’s not out of the picture.  Maybe I’ll just start the drawing up a little bit higher.  First, I have to convince the hubby it was his idea.  *wink*

Image: Moxie Fab World

Would love to utilize this chalkboard calendar in our studio/office.  Genius!

Image: Houzz

Image: Style Files

Image: Anthropologie

As usual, Anthropologie has some of the most inspirational set design out there!  Love love the idea of drawing frames, chandeliers, and more onto a chalkboard wall.  In real life though, the chalkboard rug isn’t such a great idea.

If you’re not digging the black because you’re worried it will be too dark, check out Martha Stewart’s article on how to make your own chalkboard paint in any color at the bottom of the article.  It requires a flat-finish latex paint in any shade & un-sanded tile grout mixed into it.

I’m planning to follow this post up with chalkboards in wedding decor, so keep your eyes peeled.

And don’t forget to send your pictures to us!!

Paintable Wedding Bunting

7 Mar

Here are some amazing bunting inspirations I just had to bring to the table.

These are all made from burlap, which I’m bringing to you because you can paint on it, thus make it completely custom!

If you will have a long engagement and have some time on your hands, or if you have a little creativity, or if you are just an aspiring do-it-yourself-er…this is the perfect decoration to start with!

Here are some of my ideas for what to paint

paint with your wedding colors– this is just a great opportunity to bring your colors through in more of your wedding decor.

-your print or motif– from stars, to stripes, to the fancy swirl on your invitations, carry your “theme” by painting it on your bunting

-your names or initials- can I just say…cute!

-fun sentences & sayings- think “we’re getting hitched” or “how sweet it is to be loved by you”

-signs, directions, informational- this would be a great place to write out “Ceremony here”,  “Thanks for coming!”, “Welcome”, or even “Pls sign our guest book”

Instead of burlap (which tends to lend a fairly rustic or farm feel) you can also use plain cream canvas fabric instead (perfect for that garden party or nautical theme, or pretty much any theme since it is a bit more understated than burlap.

Either way, with a little paint you will have one-of-a-kind, custom, and “just-you” bunting!

Enjoy…

Burlap banners::  funkyshique & SheriSewSweet.  Photography:: Elizabeth Ray Photography

If you’re not an artistic, free-hand-it type of person there are still options for you!  Try looking into some stencils.  You can find them at your local Michaels or Joanne’s Etc. stores, but even better are the online stencil resources.

At Cutting Edge Stencils there are gorgeous prints & patterns that I am madly in love with!

Stencil photos above from Cutting Edge Stencils

Royal Design Studio and Modello Designs also have incredibly beautiful options and very large libraries.  Royal Design Studio has some great stenciling tutorials and Modello has a custom stencil option, where you can send in any graphic (as long as it is yours and not copyrighted) and they will turn it in to a plastic cut-out for stenciling.  This means you can do exactly what you want for your bunting & stenciling needs!

If you don’t have a graphic, we at Lifework Media can create one for you.  Or if we’re doing your invitations or other paper goods already, we are more than happy to send any of the custom graphics from your invitation suite to Modello.  Otherwise, don’t be afraid to ask your stationer to send your graphic, print, or motif to them for a completely custom stencil that carries your theme throughout.  And if you’re not in the mood to make these yourself, contact us…we’ll make bunting for you!

Good luck!

The Bunting Trend

7 Mar

It is one of the hottest trends in the wedding and event industry…and it really is fabulous.  Today’s bunting is a nod to the circus days, the red or striped triangle banners strung together and attached above the tent openings, but with an updated twist.  Bunting is a wonderful decoration to add to your wedding or event!

Here is a collection of some real wedding bunting.  The examples below use a variety of patterned & solid fabrics to create a shabby chic, country, and somewhat vintage look….but bunting can add ANY feel and look you want depending on the colors, patterns, prints, and materials they are made from.

Found at:: 1 Ruffled 2 & 3 Beautiful Little Weddings 4) Peonies & Polaroids

If you want to change up the look to fit your wedding colors or theme better, try finding different fabrics.

One of my favorite fabric sites, Calico Corners, has a great variety of prints from hip & modern to rich & ethnic.  My favorite collection is the Dwell Studio Collection– what fabulous colors to model your wedding after!  This will have to become a color palette for another post.  Another favorite for fabric is, surprisingly, Ikea.  I love their Elisabet prints for a super colorful & preppy wedding or their Gunvor for a very bold, graphic, black & white wedding.

Find the perfect fabric, cut into triangles (or circles, or squares! etc), & attach (sew, staple, glue) to string, ribbon, twill, or double-fold bias tape for easy bunting fabulousness!  It’s easy to do yourself and it’s easy on the wallet too.  Try searching “DIY bunting” for help & tutorials.  And, if you’re not into making it yourself there are a ton of people offering to make it for you!  Check out Etsy for pre-made bunting, many of which can still be customized for you, or contact us– we make it too!

Feel free to send pictures of your wedding bunting, or if you are a photographer or designer who has pictures from a recent wedding you shot or styled with bunting.  I’d love to see it, and maybe even post it on the blog to inspire all!

Everything design. It’s time for a change.

7 Mar

Okay, not so much of a change as an ongoing progression….but, thanks to all the blog support & growing visitors, the Lifework Media blog will be expanding to cover much more than just what we’ve been creating & doing here at work.

I love my readers; it’s all about you guys….so I want to spoil you with just a little bit more for your eyes to feast upon!  I plan to offer up pure awesomeness in design; focusing on categories such as weddings, home, graphics, and more.  I will post pictures for inspiration and resources for where to find & buy products.  We may include some do-it-yourself projects & ideas, and possibly an often updated “top trends” list, plus some of our own work as well.  You can expect to find inspiring & beautiful ideas and products for decorating your home, wedding, or party; centerpieces, escort-card displays, gift table decor, invitation design, furniture, style & “theme” ideas, and more.  Plus, you’ll find creative & beautiful design in packaging (bottles, labels, boxes, and products) or websites or logos or anything else beautiful and creative…  Not to mention, we’ll let you know when we can make or design something you see on our blog- you might already be in the right place!

My promise to you:

I will post anything I find inspiring and beautiful (and there is a lot)!

It’s all in the works right now as we brainstorm ideas and figure out how to organize this all on one site.  In the interim- keep visiting to see the progress and please give us a little bit of time to get everything switched over and completed!

Oh, and you might see that “header” at the top of the blog change often until I’m happy with it.

Enjoy!  And thanks for being a loyal reader.  You’re appreciated and loved!  ♥

2nd edition of Things We ♥ for those who may need some inspiration

27 Feb

I find inspiration in absolutely everything!  Sometimes I forget to pay attention to what I’m doing because I’m so busy looking around.  Thank God for a wonderfully supportive and patient husband!  🙂  To be honest, I really can’t go anywhere without seeing something I can use for work, to inspire creativity, or to utilize in my house remodel …and I write it all down for later use.

Things We Heart ♥ is born out of that growing list and I feel it’s something I should share with all of you because every once in a while I think everyone needs a little extra somethin somethin to make their hearts go pitter patter.

Here are ten of my somethin somethins:

The Artomat– art vending machine project.  It’s awesome!  Is there one in your city?

Olive Manna– love it all, but currently really digging the Newsprint bags/wrapping paper

Christian Faur- Crayon Portraits.  How amazing is that!?

Carl Kleiner- inspiring art

Terrain– love the rope chandelier and the metal flour bin

Sketch Ice Cream– amazing name.  amazing website.  amazing interior & business branding- so fun & creative!

Etcetera– love this book and you will too

Free Spirit Fabrics– perfect for reupholstering that ugly, old wing-back chair you have and turning it into a modern twist on the old

Eco-friendly Garden Collection– by H & M.  Pure adorable.

Letterpress Movie– this is such a wonderful & tactile form of art

Spring Time Wedding Inspiration

25 Feb

I must admit, even though this winter was extremely mild over here in western Washington I am SO ready for Spring!  The Crocus are in bloom all over our property, the sun is out every few days (followed by nasty rain storms), and the Spring-time wedding inspiration is hitting the blog and design world with a frenzy!  I am so in need of the warmth, color, and happiness of Spring; not just outside but also in terms of design.

Just saw this fabulous wedding picture over on Style Me Pretty’s blog, taken by Green Apple Photography, and I had to post it here for all of you to see!

I love this photo on so many levels.

Visually- it just pops, with the bright colors and white tops pulling out the bride’s wedding dress.

Then, notice the shoes- all different & fun!

The skirts- they are an absolutely adorable style idea for bridesmaids!  Not to mention, the skirts are all just a teeny bit different from each other, which I think just adds visual interest while keeping the cohesiveness.

The cardigans?  Again, what a fabulous style idea for bridesmaids and a bold show of the growing aversion to the “typical” bridesmaid dress.

Last, the flowers- they pull the colors from the skirts & shoes so perfectly and are just pleasing to the eye.

This picture puts a big smile on my face and this bride makes me think Spring!  Happy thoughts.  It’s coming!

Circus Glam. Take 1 on Circus Themed Invitations.

21 Feb

One of the most stressful parts about my job, surprisingly, is not the actual creation of the invitations but hitting the send button on an email to a client for them to see my design for the first time.  EEEK!

I feel so much pressure and worry.  “What if they don’t like it!?”

Really, it’s pretty hit and miss.

Often I am given a sentence or two description of what a client is looking for.  “Old Hollywood Glamour with pink, charcoal, and black for colors.”  Or “vintagey, circus glamour using purples and chartreuse and pops of red and turquoise.”  That’s great, but I always want to just interrogate them for more information.  🙂  Do you want an accordian style invite?  A booklet?  Separate pieces all layered into an envelope?  Do you hate stripes?  Are you opposed to animal silhouettes?  Do you like this look more than that look?  What about wording; more formal or more casual?

Instead, I take what I get and just use as much as I can to inspire my ideas of what I think they want to see.  Always in the back of my mind I know that I might be totally off!  And I know that most likely there will be changes!  And that’s okay with me…because I can only do the best I can do with what I’ve been given to work with…and changes are to be expected!  There’s no way I can nail all of those elements perfectly the first time around, especially when I don’t even have all the details like the spouse’s name, or the time of the event, so I can’t take it personally.  I’ve had to learn that the worst case scenario is the client might tell me they are looking for something more like “such and such.”  Then I can go ahead and make exactly that- so I end up getting what I wanted in the first place: more description and specifics.  Right!?  That’s really not so bad.

Really, my job would be a lot easier if I was just told exactly what to make!  Duh, because the hardest part of my job is the research and coming up with the idea and the look.  If only I could just be the middle man- you tell me exactly what you want and I’ll make it, but no thought has to go into it for me.  Fabulous.

Nah…I really don’t want that.  The BEST, most FUN, and most REWARDING aspect of my job is the hardest part….and I wouldn’t have it any other way.

I’ve realized that my job really is to use my ideas and personal style to create invitations for my clients that are stylish and “in” right now, and to create something my clients may not have been able to envision themselves- as I am finding out is often the case.  As time goes on I am becoming much more aware that my clients often don’t know what is “in” or exactly how they want their invitations to look.  This is such a foreign concept to me because as I planned my wedding, my invitations…and even now as I plan my house remodeling…I know EXACTLY what I want the end result to look like and I am very picky about not liking certain elements!  I guess I just assume when I send my first draft of invitation ideas on to a client they will be that way too!  So far, not the case.  How cool!

That’s what being a designer is I think.  At least to me, a designer is someone who puts their own vision & interpretation of an idea onto paper (or canvas, or wood, etc right?).  People come to designers to have THEM create the look, to do the work for the client instead of the client doing it themselves!  It’s a lot of trust really for a client to hand off the design of something important, whether it be invitations or a logo, to the creative genius of someone else.

So, when I create an invitation or a logo or anything else, I create it as if it was my own.  I put my whole heart and soul into it as if this was the invitation I would be sending for MY birthday or the logo I’d use for MY business, and that way every piece of work I do is not only one hundred percent completely me and my vision of my clients description, but more importantly is created as if it was the most important assignment I’ve received.  I hope my clients are able to see and feel that passion!

Here’s a sneak peak of the initial Circus Glam Invitation suite for the uberly stylish Jeanne E.  You can click it to view a larger version.  Some names & personal information such as the address have been changed to prevent a bazillion uninvited guests from appearing on Jeanne’s front door for the party!  🙂

First draft…here we go with hit and miss, right?

My thought is those bottom accessory pieces will be laser cut in that fun shape.  They will be inserted into a brown Kraft envelope that will be attached to another card with the purple striping on it.  Fun fun!

Of course, this invitation could change a ton, or maybe not at all, depending on if I hit it close or not.

In the meantime, the anticipation is nerve wracking!  Hope YOU like it at least!  🙂

Circus Glamour. Kinda like glamping, right?

17 Feb

I recently got a very fun invitation client.  She is having a two-day, 70th birthday bash and the theme is vintage circus with glamorous accents.  Pure fabulousness!

It’s an interesting combination.  When I think of circus I think corny, bright colors, child-like….but then you add in the word “glamour” and it throws the whole stereotype off.  Glamping.  Camping with a touch of glamour.  Camping equals tents, bad food, probably not the best nights sleep.  Glamping…well you’ve got yourself a mini hotel in a tent in the wilderness!

I have to say this is probably the most wild, out there, and fun theme I’ve gotten to do so far.  I LOVE this kind of stuff!!  It gives me a chance to be really creative and come up with out-of-the-box ideas.

First thing I usually do before creating an invitation suite is a ton of RESEARCH!  This is not as boring as it sounds.  On the contrary, it’s like half of the fun for me because it involves looking up pictures and requires a lot of googling for ideas and inspiration.  It gets me all giddy inside and I save waaaay too many ideas to my poor computer’s files.  Loyally, she hasn’t slowed down yet or given up on me.

Then I create an inspiration board (a collage of a bunch of images) with my favorite ideas contributing to the overall look of the party or invite.  Here is the circus glam inspiration board that I’ll be working with.  This will give you an idea of the colors, look, and feel of what I will create for Jeanne’s party, and it keeps me on track as I start to design.

Next, the hardest part is taking all of those ideas and combining them into one invitation without using too many of the elements that I fall in love with.  This is quite a challenge for me- I just want to put all the best parts in!

So, I brainstorm and write down all of my ideas:

– pinwheel to spin

– custom tarot cards with invitation information on them

– silhouette art

– cut paper elements

– accordion or book style invite

– fortune teller game

– vintage popcorn bags as envelopes

– re-print vintage circus posters as envelope liners

– waving banners

….and of course…I don’t end up using all of them, but they help get me started!
Will follow up soon with some initial invitation drafts so you can see more of the creative process!

Love. All you need is love!

13 Feb

Today is a day to let those we love know just how much they mean to us!  When I stop to think about everyone in my life who is special and important to me, I get a bit overwhelmed with how blessed I have been!

I am lucky to have:

– a mom, stepdad, dad, and stepmom who I love to spend time with!  You guys are all an amazing support system.

– a pretty sweet brother- even though it’s been rocky at times- I know he’s there for me and I love him

–  in-laws who understand and are incredibly great at encouraging and supporting and helping

– a killer extended family (step siblings, more in-laws-brother and sisters, and pretty cool aunt, cousin, and uncle too)

– two wonderfully sweet, cuddly, and loving step-kids…but I really HATE to call them that…they’re just my KIDS!  And I love them!

– loyal friends.  Those I keep in touch with, and even those I don’t-  all important to me- especially those once a year catch-ups.

– one dog and two puppies.  They are unconditionally loving and kissy…and it’s wonderful to come home to such happiness, barks, jumps, and wagging tails!

– a perfect husband.  for me.  flaws.  imperfections.  goofy weird things he does and all.  those are what make him my husband and not someone else.

– grandparents.  all of them are still here!

BUT…

This Valentine’s Day someone is standing out a bit.  No, she’s not more important or better….but she IS important…and she’s in with the BEST….and she’s just been on my mind.

This Valentine’s Day I’m thinking of my Grandma Rhoda.  Quiet, introspective, reserved.  She watches and listens- REALLY listens…and seems to just take it all in.  When I’m with her, I know she’s 100% there and won’t forget a single thing.  I know I have her complete attention and THAT is something to really cherish these days.  Truth is, you just don’t find it much.

I didn’t spend much time with Grandma Rhoda growing up…for whatever reason.  But I had the privilege of spending a good three/four days with her this past October.  ONLY 3-4 days though, because as she says, “Guests are like fish.  After a few days they start to smell.”  🙂  I feel her visit was the greatest thing ever because now I have a relationship with her that I really missed as a child, and hadn’t even realize what I missed out on.

Now I know.

To me, my Grandma Rhoda is strong & perseverant.  She’s a feminist in a way- not bound by the old-fashioned expectations of mothers or wives.  She’s bold.  To me, my Grandma Rhoda follows her heart, goes after what she wants, and doesn’t worry about the world and what they’ll say.  She’s loving.  She’s supportive.  But not in a I’ll-tell-you-all-the-time kind of way.  When she says she loves you she means it.  And it means a lot to you …because she doesn’t say it so often they’re just words.

And if she doesn’t love you, I don’t think she’ll pretend.  You know what you’re getting with her.  She’s real.

I guess I wanted to make this year’s Valentine’s Day a tribute to her because I’m inspired by her, and because everyone should know.  And she’s special to everyone who knows her, even though she’s far away and I don’t see her often.    And because…Valentine’s Day is not only for husbands & marriages…but also maybe to new found friendships with someone you never really got to know.  For me, this is Grandma Rhoda!

Happy Valentine’s Day to everyone I love!!!

Forever Fairmont Event- Fairmont Olympic Hotel, Seattle

27 Jan

The Fairmont Olympic Hotel, Seattle- a super stylish, artsy, and modern hotel that I absolutely LOVE is putting on an event… “The Forever Fairmont Event”…this Friday (tomorrow) and I was lucky enough to be asked to participate in some of the design aspects!  The incredible Daniela at Bella Signature Design, who I work and collaborate with often, will be designing the decor & tables- and I designed the menus, seating cards, and favor tags to go with her fun, yummy, and colorful spring theme!

This is very exciting for me because there will be 200 brides at the event viewing everything from table decor, flowers, and paper goods like menus & seating cards…thus, they’ll be viewing my work!!  Yippeee!

Here are the finished printed paper goods for you to see.  Can’t wait to follow up with pictures of the actual event & the tables!

Blink Lash Bar- Eyelash Bar Logo

18 Jan

I had the privilege of designing a logo for a business, Blink Lash Bar, in Seattle.  This will be a hip, stylish eyelash bar located on Capitol Hill.  Eyelash bar!  From what I’ve learned, eyelashes are applied professionally and stay on for a week or so before needing to be reapplied.  How cool!

The clients wanted Old Hollywood Glamour style.  Their colors?  Black, Smoky Gray, and Fuchsia.

This was a SUPER fun logo to work on!  Feminine, elegant, formal, royal, and elaborate…Old Hollywood Glamour is actually one of my favorite styles!  Think pink, diamond-tuck cushioning, black crystal chandeliers, silver, glass, Marilyn Monroe, animal prints, and mirrored surfaces…

Think fabulous!
Here is the finished logo for Blink.  Hope you like it!

Apology Necessary

16 Jan

There’s nothing I can say to make myself feel better about the fact that I have completely neglected my blog!  All I can do is apologize to those who actually read this.  Grr, I had set a goal of consistently updating the blog.  “This time will be different. ”  Hmm.

But, in my defense, it was the holidays!!!  You understand, right?  It’s that time of the year when I scramble to buy presents, attend dinners and gatherings with my family, fly or drive home to Spokane where I split my few day break between two sets of parents and old high school friends…not to mention…this year was a bit different because we bought two puppies.  Yes…TWO!  I knew you’d understand!

So?  I’ve been a bit busy, which is a great excuse to not update a blog!  Much better than “hmm…didn’t have anything new going on…”

Alright…so you want to see pictures of the pups.  Here they are in all their glory.

This slideshow requires JavaScript.

Ahh…nights of very little sleep you are finally over!!  The puppies have graduated on to sleeping for 6-7 hrs straight each night before crying to be let out for a potty break.  This is after they woke up about every 2 hrs for the first week.  They also don’t pee & poop in the house every hour anymore- or right after just taking them outside- which means I get to sit down for a few minutes here and there.  And I want a baby someday?  What?

So…the growing puppies growing up is fabulous for me!  Now I can begin the updating.  🙂

Brooke- for Stella & Dot

14 Dec

Have any of you heard of Stella & Dot?  They have some of the best, cutest jewelery!!!  You can visit their site by clicking here and checking out some of their fabulousness.  My favs- the Charm Necklaces or this Brooch Necklace.  Gorgeous, classy, feminine…yet there’s a bit of toughness thrown in there too.

All this is to say, lucky for me! when Brooke came to me with a new business venture she is doing with Stella & Dot.  She wanted business cards & blank invitations designed with the Stella & Dot colors, prints, and look.

Here are the digital versions of her pieces, below.  The designs were printed onto a gorgeous shimmery white paper.

Business Card

Spring Invite

Fall Invite

Pretty cute huh!?

Things we ♥

18 Nov

Need some Thursday night love??  Yes, you say?  Well good, because we’re going to start a new random post called… ***drum roll please***

…a collection of links to the best, coolest, most fabulous things ever!  Or at least we think so.  And THAT should fill your love bucket.

While I wish I could keep all of the bestest things I find to myself…it’s really no fun…and I want all of you to experience and see some of the magnificence that I find so fun, inspirational, creative, and amazing!

Here are some of my faves

to keep you busy

to inspire you

to make you wish you could be an artist

to start you on a wicked whirlwind of blog hopping

and to make you smile…. hopefully

Click the pictures to go to the sites

LIFEWORK MEDIA LOVES:

Sticker Wallpaper– so incredible!!!

Book Alphabet– wow.  Need I say more?

Laduree– even their trucks look delicious

Peter Callesen- he’s amazing!!

Shona Heath– she’s pretty amazing too!

That’s it for tonight!  Hope that got you started and inspired something in you!
More amazingness next week.
-Marissa

One smelly invite- the fabulous Napa Winery Inspired Wedding Invitations

17 Nov

I’ve started work on Brittany & Corey’s Napa Winery wedding invitations.  You probably recognize their name from a few posts back where I posted pictures of their Save The Date.  The are looking for a winery inspired wedding invitation, but nothing with an obvious winery theme.  Using deep purple, eggplant, and mossy green for their color palette and some natural elements, I think I’ve got just the design.  I am going to be making two or maybe three sample invitation ideas for Brittany & Corey to view and pick from, if I can dig in and find some more inspiration!  I’m stuck on sample invite number one.  Feel free to send ideas.

Thus said, I tend to put all of my best ideas into one package.  Now that I’ve made the first sample, I’m kind of out of ideas for a second one because I used everything I love in the first!!  SO…first sample =  SUCCESS!  I’m totally happy with how it turned out.  The invitation is just like I envision their wedding will be- luxurious, rich, textural, and elaborate.  I used a mix of raw silk (think luxe), stained oak (think wine barrels), and moss (think stinky).  I’m hoping as the moss continues to dry out it will not smell.  I don’t think “eww” is the first impression Brittany & Corey want to give their guests when they open their invitation boxes.

“But it looks pretty!!” I say.  Beauty is pain.  We cram our feet into stilettos that hurt our toes…but we don’t care…they look good, darnit!  Well, doesn’t that rule apply to invitations too?  Doesn’t matter if it smells!  It looks good!

Here is a picture of what I have so far of the first sample.  It’s not done yet…just a snapshot of the many stages and processes that go into making a full invitation suite.

…sooo…today is a day of research to gather more inspiration so I can come up with something for my next sample.  I love these days- they mean snuggling with the dog on the couch and scouring the blog and design world for invitation, creative, and artistic love.  AND they’re just as important to the whole creative process as actually gluing the silk to the cardboard, drawing the pattern on Illustrator, or dipping the brush in paint.

I’m leaning toward a rustic, not-so-luxurious version of “vineyard” for the next sample.  Ideas?  Anyone?

Turkey time- but not as in food…

12 Nov

I think you will be pleasantly surprised to hear Turkey has MORE ruins to see than Greece!  I know…who knew?  Not us!

In 08, we went to Turkey to shoot video & stills for a Ya’lla Tours marketing DVD- later titled “The Footsteps of Paul.”  This was going to be a DVD for Ya’lla to hand out to Church groups, etc.

After being to Greece, we were just absolutely blown away as to how much more there was to see in Turkey, in terms of amazing ruins.  WOW.  If you didn’t know, Turkey used to be Greece, hence, tons of ancient Greek cities and ruins are there (in what is now Turkey).

My favorite site was Ephesus, an ancient Greek city.  In the 1st century BC, Ephesus had a population of over 250,000 people (it was the second largest city in the world at the time!) and MANY of its sites are still standing!!  There were several amphitheaters, shops, bathrooms!, an absolutely stunning library, temples, and more to see at Ephesus.  Seriously amazing.

Here is a picture of the Library in Ephesus- my favorite, favorite, most favoritest ancient ruin everrr:

And more pictures to satisfy your fancy-

This slideshow requires JavaScript.

Business Card Obsession / LWMedia business card

6 Nov

The title gives it all away.

Hi, my name is Marissa…and I’m obsessed with business cards!

But not just any business cards.  There are SO many creative business cards out there now I can’t handle it.  People are really thinking out of the box and coming up with the best ideas.

Here are a few of my favs for inspiration:

Okay, so maybe that last one isn’t really practical;  I wouldn’t want a garden growing in my purse…but you get the idea.

Those are so creative!  And I would hire any one of those people just based on sheer awesomeness!

Business cards are really important, as they’re like a whole interview in one little second.  I tried to get the feel of creativity and coolness in my Lifework business cards.  Plus, there’s a little eye teaser in there too, for people that really look at my card.

So…last but not least, here’s my Lifework Media business card.  You gotta look kinda closely to see the coolness factor.

I dig it.  Whatcha think?

Red Lotus

5 Nov

A few weeks ago, Dinah from Red Lotus contacted me about designing a logo for her up-and-coming business.   Dinah makes and sells beautiful fabric baskets in various sizes.  They are bright, colorful, and very versatile.  While functional, they can also be used as home decor (think stylish storage baskets).  Not to mention, her business model is absolutely fantastic; she donates part of the proceeds to an organization that provides opportunities to women and children!  Vibrant products- what a way to celebrate women!

Dinah will soon start selling these baskets on Etsy.  I will update this post with the information on how to buy them as soon as her baskets are available!  Check back for Red Lotus fabulousness!

So for the logo, we met at Dinah’s house, where I got a little taste of her personal style… and was able to look through all of her baskets to get a feel for what she wanted in a logo.  Dinah was torn between whether she wanted a very simple Lotus flower or a more elaborate one…so in the end we created two!

First we created a layered and feminine Lotus flower seen here:

I just LOVE it!

And the second logo we created was a bit more graphic and simplistic (below)

Which I think turned out great!!  The one Dinah ended up using was this one.

I can’t wait to see her products up on Etsy.

Good luck on your new business Dinah!

-Marissa

Greece Photo Shoot

3 Nov

As promised: pictures from our Greece trip in ’08 for our client, Ya’lla Tours.  Just a few of my favorites this time.

Egypt photo shoot

1 Nov

We have been fortunate enough to have the opportunity to work for a tour company, Ya’lla, on numerous occasions.  We shoot video and still pictures of the tour groups, buses, and all sites for Ya’lla to use in their marketing materials.  With the video, we edit it and make a marketing DVD, and duplicate 1000’s of that DVD, which Ya’lla uses to mail out as samples for prospective interested travelers.

Ya’lla Tours, owned by our client and now good friend, Ronen Paldi has got to be one of THE best companies to travel with if you’re looking to do a group tour.

Ronen’s tour guides in each location are top-notch, well-educated, and well-spoken.  Not to mention, Ya’lla’s tours are planned with some of the best hotel accommodations, food, and site-seeing around.  Unfortunately for those of us at Lifework Media, we’ll never travel so well again.  How will we ever have a great vacation without comparing it to the fabulous hotel rooms and food from Ya’lla’s tours!!?  🙂

On top of it all, Ronen is quite a kick to spend time with.  Born and raised in Israel, he is definitely unique and entertaining!

Now, I am most certainly NOT the type of person to want to do a tour when I travel.  I just want to be able to do and go where I want, when I want…and I don’t always want to have to be cheery and talkative.  Sometimes I’m inquisitive when I travel.  Other times I just want to watch everything else.  Usually, I want to take a million photographs, and do it without people getting in the frame.

When I first went on one of Ya’lla’s tours to shoot, I was quite anxious over the nerdiness of traveling with tourists on a bus and being those “flashy Americans.”  I soon got over that, because traveling with a tour group is absolutely AWESOME!  We’ve ended each trip with a bunch of new friends throughout the United States, and that more than anything, is the most rewarding part of the job.  If you haven’t tried a tour when you’ve traveled, give it a shot!  And you should use Ya’lla when you do!

1- you never have to worry about where you’re going next

2- you never have to worry about how you’re going to get there, navigate small roads or maps, or buy tickets

3- you don’t have to read!!!  The tour guide has all of the knowledge you’d ever need, so you can learn about what you’re seeing without getting sick by reading in the car on the way!

4- you never have to worry about missing an important site or thing to see (it’s hard when traveling to an unknown location to sift through the books and figure out the best and most worthy places to see in the short amount of time you have.)  We’ve done that plenty of times and it’s not fun!  Especially when you get home and realize you went to a tacky tourist trap but missed an important site.  Eeek!
Long story short, here are some of my favorite photographs I took while in Egypt.  I’ll be posting ones from when we traveled to Turkey and Greece with Ya’lla as well, so check back!

This slideshow requires JavaScript.

Head Shots

31 Oct

Paige loved the photos we took of her family so much that she wanted some more!  This time we took portrait-shots of her to surprise her husband, Lance, with a bunch framed for Christmas!

She is the world’s most perfect model to shoot!  Not only is she gorgeous, with her high cheek bones and unique look, but she was very comfortable in front of the camera and very still when I needed her to be.

This one is my favorite one from the shoot:

Here are the rest of my favorites.  You can click on them to see them full-size.

Family Photos

30 Oct

If you aren’t already aware…Lifework Media does photography as well.  You can view some of our photography galleries on our website by clicking here.

Over the next few days I’ll be posting my favorites from various client jobs.

First post: Family Christmas Photos for Lance & Paige and their adorable children Nathan, Courtney, and Cody.

Hope you like them!

Tax Free Retirement Book & DVD Covers

26 Oct

Patrick Kelly is an awesome guy to work with.  He is seriously smart and seems to always have a new business or idea- and they ALL seem to do very well!  Lifework Media has had the privilege to do a lot of work for him; from video shoots, to graphics, to DVD duplication and more.

Here are some pictures of his last book: A National Bestseller! and the DVD we shot, edited, and created for Patrick’s seminar series.

Chartreuse & Gray- I brought work home

26 Oct

We just bought a new house on five acres.  It’s an old 1910 original farmhouse; absolutely awesome, and totally inspirational.  The property is filled with outbuildings galore!!  A potential office space someday- an adorable little art studio for all my creations- and of course a barn which now holds my new C&P letterpress and will be completely revamped and remodeled soon I hope (to become my print shop)!  The house needs a lot of work, in a good way.  Did I mention it was built in 1910?  We are the THIRD owners EVER of this property…so while the whole house has been updated and remodeled and additions have been added, it still needs a ton of work to get it to look like what I envisioned when I walked through the doors for the first time.

First, I have to say: I loooove gray.  EVERYTHING I have is some shade of gray right now.  The walls, some furniture, clothes….I’ve even painted the bathroom vanity gray.  On that note, I’m also really into chartreuse & burnt yellow- hence- I brought my favorite inspiration colors that I want to use on all of my design work into the house and painted our dining room a few weeks ago a BEAUTIFUL shade of chartreuse next to the world’s most perfect gray paint ever (Benjamin Moore- Stardust).  Yes, I didn’t want to give out the name because I want to be the only one with that perfect color of gray in my house…but I know any of you designy, artsy, creatives out there would kill me if I didn’t give out the secret.  Grr.  Not to mention, this chartreuse has a fabulous chameleon effect and changes colors in the sunlight!!  During the day, it is a burnt yellow- at night…a vibrant shade of chartreuse.  I LOVE IT!

One room at a time.  🙂

Our new acquisition- a Chandler & Price Letterpress

24 Oct

I…LOOOOOVE…letterpress.

Love it, am obsessed with it, can’t get enough of it.

I think letterpress is the absolute most beautiful form of art ever and I have been dying to own a letterpress machine and learn how to use it for soo long!  Plus, it would be a great skill to add to my repertoire and a great service to provide for my clients.

Hence, we at Lifework Media drove down to Portland, Oregon to meet a printer and to buy his old Chandler & Price press!  The guy’s printing shop was in a huge warehouse and filled with TONS of printing goodies from paper folders, to laminators, to old presses (plus gorgeous work tables, cameras, and more).

I was in heaven…and this letterpress is so so fantastic.

It’s really no easy task to move these 1,800 pound behemoths!  We had to rent a Uhaul in Portland to get this thing back home.  Not to mention, use a forklift to get it into the Uhaul.  Luckily there was a guy next to the warehouse that had a forklift and did the work for us!  But once we got back- we had to rent one to get it out and into the barn that will be converted into my studio soon!  This letterpress was almost…and I mean…ALLMOOST too heavy for the forklift – which wobbled and tipped forward a few times during the process.

Brittany & Corey- Napa Winery Save-The-Dates

22 Oct

Brittany & Corey are a young couple from the Seattle area.  They are having a destination wedding at Jacuzzi Vineyards in Napa, California and I’ll be doing all of their stationery pieces for the wedding.  Their wedding will be over the top!  It sounds absolutely fabulous, with every single detail planned and coordinated throughout the whole event from gift bags for guests to hang-over-kits for the day after, not to mention, they will have fabulous invitations too!  🙂  Of course, the fabulous Daniela at Bella Signature Design is their coordinator, florist, planner, designer…and more.

Their colors are a deep, rich, eggplant purple and a mossy green- with some accents of fuchsia.

Eggplant and Moss Green color palette

So far we’ve completed the Save-the-dates…and of course I’m REALLY looking forward to designing the invitation suite soon too!  Sounds like we’ll be using real moss in the invites which I love love love!!!  I adore mixing natural materials and textures in with my designs.

For Brittany & Corey’s wedding I created a custom print that will be used throughout the event (on everything, but in slightly different variations so that it all goes together without being matchy-matchy).  Tough to explain, but you can see great examples of this same idea by visiting Tara Guerard’s website and viewing some of her galleries at the bottom.  She has beautiful work!

Custom Motif & Pattern- reminiscent of a trellis

The Save-the-dates were to be luxurious, elegant, classy, and evoke a feeling of the winery without any of the cliche’ winery designs.  No grapes, no barrels, no vines.

The graphic of the final save-the-date design.

I was worried about their colors at first, I’ll admit.  It’s tough to use green & purple, AND fuchsia in an elegant way.  I printed their custom pattern on both sides of the envelopes, designed custom coordinating address labels for them to hand-address to their recipients, and created a three layer piece using coordinating dark purple and mossy green papers.  I looove the end result!

John L. Scott broker associate branding

24 Aug

Brooke Grossberg contacted me about doing some branding for her new job.  Brooke is this adorable, classy blonde from Bainbridge Island, about 30 minutes from us.

The more I hear about Bainbridge and the more I visit, the more I think I would like to live there someday.  It is beautiful, and of course Brooke didn’t help when she talked about it!

Brooke is pretty awesome herself.  When I met her for coffee she was SO sweet and bubbly!  Just makes me excited to get to work with someone like that.  She contacted me because she was going back to work as a broker associate for John L. Scott and wanted business cards and a 5×7″ announcement mailer.

The starting point was to create a motif for Brooke, that would be used throughout her pieces.  We created something for her that was somewhat feminine, but was also gender neutral.

After playing with many fun color combinations, Brooke and I decided on navy blue & orange.  Stylish, yet masculine too!

She wanted a business card that was very different, very high-end, very unique.  I came up with the idea of a layered business card.  We would do one layer of shimmery white paper.  The next layer would be the printed business card, a bit smaller.  And the third layer would be a thin band on top of it all with her name/title.  It turned out fabulously unique and definitely captures the high-end, hand-made, luxurious feel she was going for.

Here are the graphics of her motif, business card design, and announcement.

Three layers make up this business card

Bloom Logo

10 Jun

Daniela from Bella Signature Design created a secondary company called Bloom, which is floral design for weddings- instead of the whole package service that Bella Signature Design provides (planning, designing, florals, etc).

Here are examples of the logo & branding designs we created for Bloom!

Bella Signature Design Logo

24 May

Occasionally I do some design work for Daniela over at Bella Signature Design.  I absolutely ADORE her sense of style, and just love love love to create pieces for her because she always wants something fun, hip, and stylish.  Not to mention, she is extremely sweet, easy to work with, inspirational, and so so incredibly talented!  Who wouldn’t swoon over the opportunity to design for her? (let alone have her design your wedding…wink wink…I’ll never forget the fabulous job she did at my wedding two years ago).

When Daniela asked me to recreate her Bella logo,  it was one of the first projects we worked on together professionally.  In fact, as I’ve mentioned before, this was a direction I wanted to take the business, but we’d been so busy with corporate work that we just never spent the time to go out and get this sort of business.  So, not only was it a first working with Daniela, but in some ways it was really the start of this whole creative, artistic side of Lifework Media (aside from a few artistic fliers and logos we’ve done in the past- most of ours have been somewhat boring!!) so it was a first in many ways for me too!

Daniela mentioned she was very into quatrefoils- so that became the new motif that her design would center around.

Here is a picture of a quatrefoil I found online to show you what they are:

You see them a TON in old architecture and buildings (fencing, etc).

Here are some pictures of the final logos.  I designed several different versions so Daniela was able to mix the logos up a bit- the quatrefoil being the connecting feature in them all.


Don’t you just looove her rich color palette!?  Can’t get enough of chartreuse lately! 

Monica & AJ invitations are finished!

5 May

Nothing much to say, just a bunch of pictures to show you of the completed and beautiful invitations for Monica & AJ.

Taking it beyond print…

1 May

I figured out what to do for Monica & AJ’s invites!!!

Any guesses??

I will hand screen print the invites!

How perfect is that?  The cream text will be so vibrant against any dark brown paper I pick.  So, I bought a screen-printing set up and am officially on to learning the ropes.  This invitation has a special spot in my heart because it has forced me to branch outside of print work and into hand screen-printing, which I have no idea how to do.  But I really like a new challenge!

I’ve been watching a TON of YouTube videos and reading an e-book on screen printing.  I learned everything- from applying emulsion, to making screens, to how much force to use when pulling the squeegie across the screen.

Applying emulsion is SO hard!!!  And you have to use one sheet for each screen so it can get expensive.  I actually ended up ordering a pint of liquid emulsion to apply with a scoop coater (I’ve officially learned all the lingo too!) which saves a ton of money and allows for lots of re-dos, which I’m grateful for.  But, I did eventually get the emulsion right.

Here is a picture of the screen:

1st Step: MAKING A SCREEN. This is a picture of a completed screen. The purple stuff is the emulsion. Basically you set the emulsion with a UV light (it doesn’t set any spot that is covered- so you use a transparency with your printed image to keep the purple from setting in those spots) The unset stuff washes out under a pressure washer, thus leaving holes for the paint to go through.  The purple emulsion blocks the paint from going through where it shouldn’t.

2nd step: PRINTING. Paper underneath, screen above.

Step 3: INKING. You place your screen down over the paper and load up the top with your ink. Then you pull with a squeegie once, maybe twice if you want a thicker print, and voila! all done!

You can only do one color at a time.  Monica and AJ asked for a 3 color invite so you have to have one screen for each different color.  Here’s a batch of the first phase of printing- the white layer.  You can see that there are two invites per page because it saves money on paper.  You just cut them all apart after printing.

With the fuschia “&” symbol added:

And finally, a closeup of the turquoise Indian design added last.  I also hand-placed pink dots in the turquoise design, on each invite.

Pretty cool huh!?

Creative work

20 Mar

Lifework Media has done a lot of work for clients over the past seven years, and while we’ve enjoyed every bit of it, we’ve really begun branching out into the more creative endeavors as I discussed before.  It seems that side of the business grows every week!  No complaints here.

In the past, our focus has primarily been on corporate, industrial work.  In many ways it is still our favorite industry to shoot video and design for- though I’ve really become passionate about the fun & stylish design opportunities that have come up recently and I find I’m working for fun in the evenings, instead of taking them “off.”

I think mainly I will showcase this new aspect of the business (creative, fun, stylish works), because I don’t know if people are interested in corporate design much??

Here and there I will upload some of our corporate client work as well, just to keep you informed in a bit of the other work we’re doing.

Stay tuned!

I need to get creative here!

11 Mar

Well…with the client’s needs and budget I can’t really do regular printing.  In order to get a light color on a dark chocolate background, I’d have to print the chocolate background and leave the cream paper unprinted so that it looks like the text is cream (but really its the paper) and the rest is ink making the paper dark chocolate.  This works fine, but Monica wants a shimmery print and it just doesn’t work well to do this method on shiny paper.  I had a sample made this week and really did not like the results.  I think this looks beautiful on matte papers, but on any glossy or shimmery paper it looks very flat.  Grrr!

I explored some other options; thermography, foil, embossing…all very expensive and foil ended up being the only one that works well with light colors on dark paper.

I’m not really sure what to do.  At this point I think my only options are to either up the budget or to somehow make the flat printed option look better and more custom.

I’m stuck and need to sleep on it!

And so it begins…

7 Mar

I’ve begun researching what to do for my Indian-inspired invites.

The clients, Monica & AJ, want some type of motif that is “Catholic-scroll-looking and Indian (but not Paisley).”  Their colors are Turquoise, Fuchsia, Cream, and Chocolate.  So lush!!  I’m really excited to have such a wonderful and vibrant color palette to work with, and can only imagine how beautiful they will all look together with Daniela’s decor and flowers.

Here is their color palette:

Most of my time so far has been spent either researching printers (to see who can print cream text on dark chocolate paper within Monica’s budget) or designing the motif that Monica and AJ would fall in love with!  That was a toughie.  I sent Monica and AJ over 15 different motif ideas that I either designed myself or owned.  I couldn’t choose!

Here is the motif that Monica and AJ decided to go with:

Now I’m off to figure out layout, wording, and printing options!

Hellooo!

5 Mar

Welcome to the Lifework Media Blog!  Let me tell you a bit about me.  I am a business owner with my wonderful hubby, Dean.  We run Lifework Media, a multimedia production company that does just about anything artistic, creative, and fun- graphic design, print layout, invitation design, advertisements, video production & editing, website design & maintenance, and pretty much anything else you can think of.  For years Lifework Media focused on corporate/industrial work, but with an expanding business and more employees we are starting to focus on some of the more creative endeavors.

Recently, the incredibly talented Daniela, of Bella Signature Design, asked me to work with her on one of her client weddings.  She wanted a high-end, Indian-inspired invitation.  I’ve done plenty of design and print work, but now was my chance to really hone in my skills and focus on invitation design!

Thus, our subsidiary, Lifework Designs started- partly due to Daniela unknowingly pushing me, but mostly out of my love for print, graphic design, brides, weddings, events, parties, and all things fabulous.